

Overview
About This Sound Room
- What's new in this room
-
 davidc joined the room
 -
Artopsy joined the room
-
 bayoublaster400 joined the room
 -
Thanks for the heads up! Does this problem include: Sunfire Signature Series II; and Sunfire Signature Architect Series II? Cheers, Carvergroupie
-
Carvergoupie joined the room
-
 Jeff Stone joined the room
 -

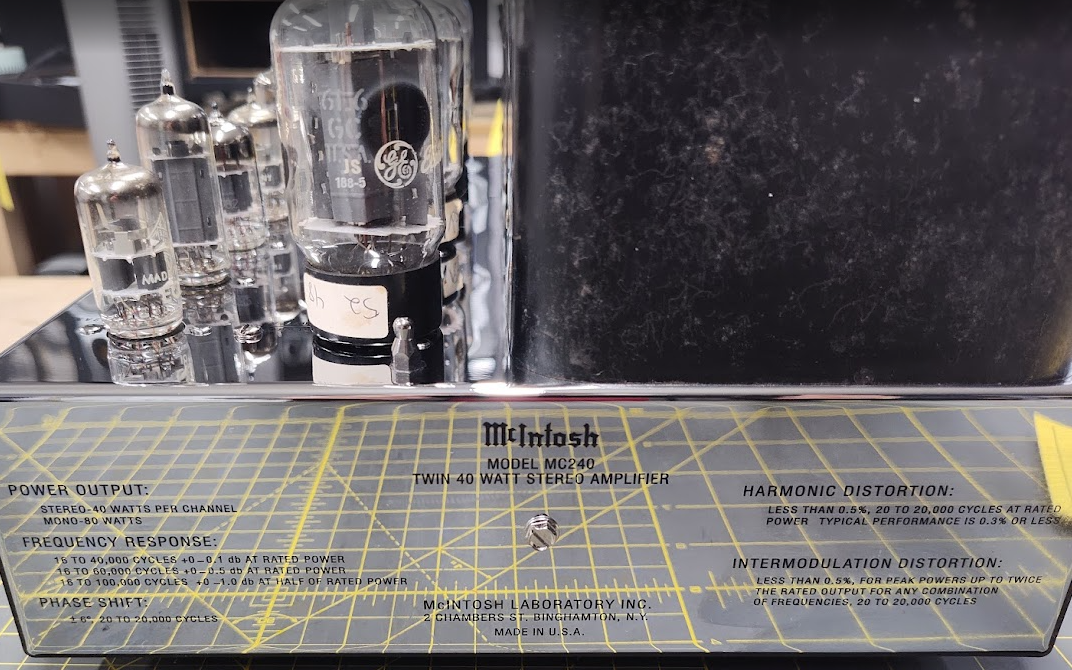
McIntosh 240 chassis replacement
fxbill replied to Nahash5150's topic in Nelion Audio's Vintage Audio Repair and Restore
Fantastic work Greg... I just received the amp back today and am truly impressed. You had a chance to use "fake" rivets with no heads, but nuts to hold them and yet you choose to use the real rivets and buck them yourself. Bravo! A little history of this amp for those of you reading this for the first time. I purchased this from the estate of a Mac collector. It was one that nobody else seemed interested in and yet, despite it's looks it was one of Mac's best amps made and this one had all original Telefunken small tubes with the exception of one of the small tubes and the 6L6's which I sourced from an eBay seller who had original Mac tubes for sale. I actually use KT66's in it although I sent it to Greg with the 6L6's since that's what the original used. The power supply was rebuilt with Authenticaps and a couple of NOS Mallories that I had laying around. The unit always sounded great after the PS refurb and I paid $1000 for the unit and about $350 for the chassis and hardware. Combined with Greg's more than generous labor cost...Thank you again Greg... I am into this unit for far less than one not even close to matching the looks of this one. I was shocked at the specs that Greg got out of the unit. Now it looks as good as it sounds! Thank you again for such detail and quality that only you can provide Greg!! Kind Regards, Fxbill -
fxbill joined the room
-
Capt.Daddy_44 joined the room
-
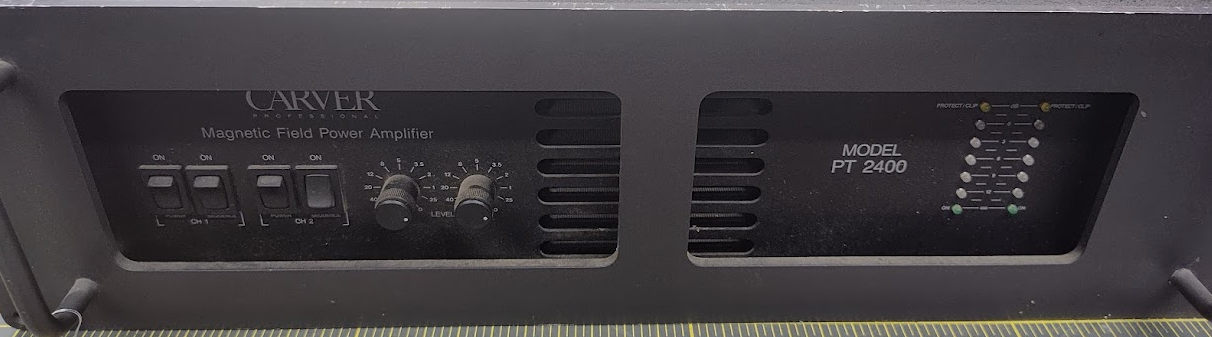
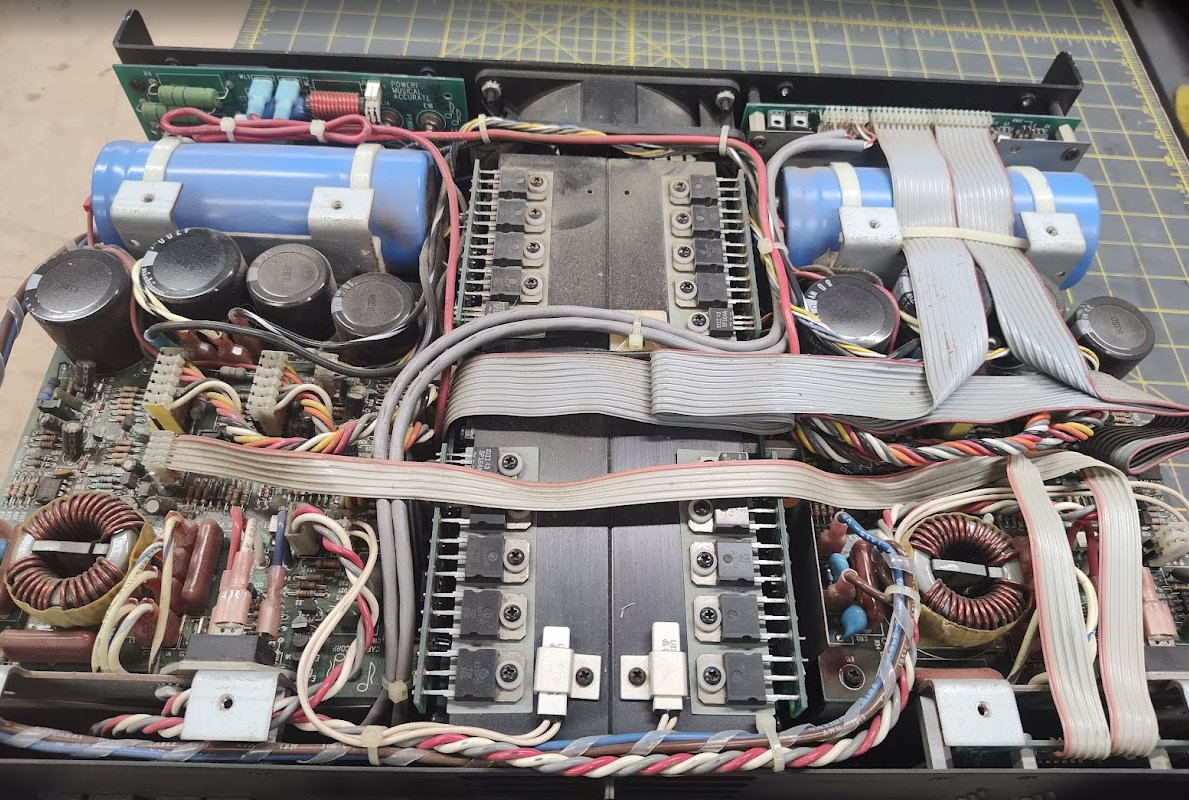
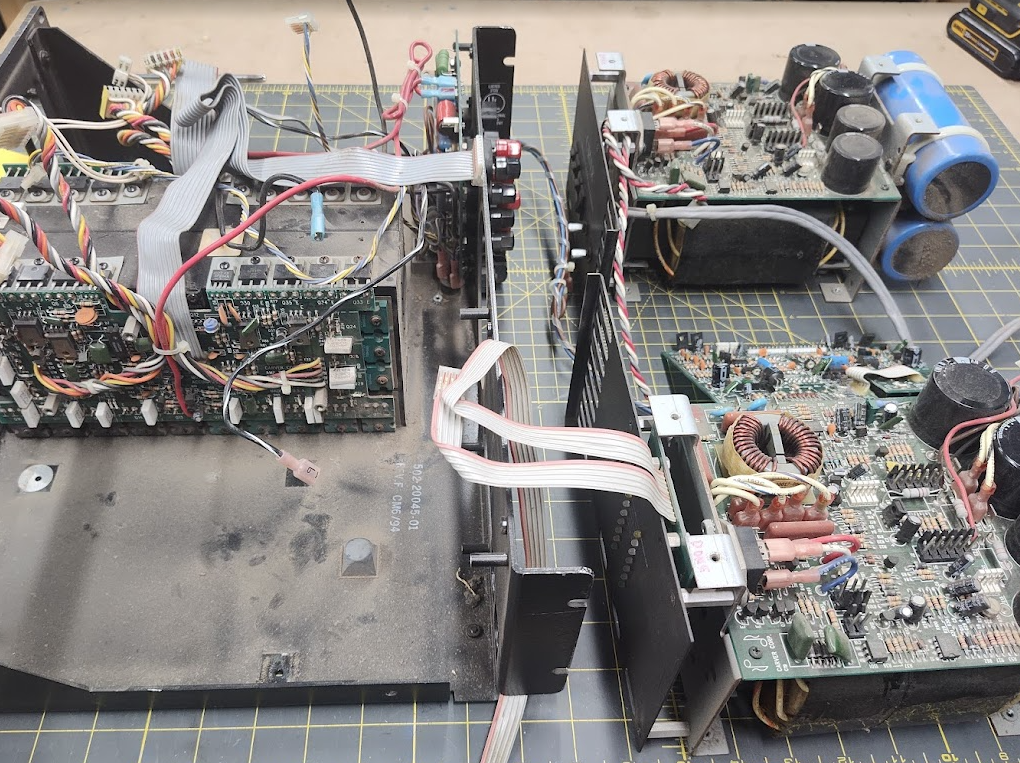
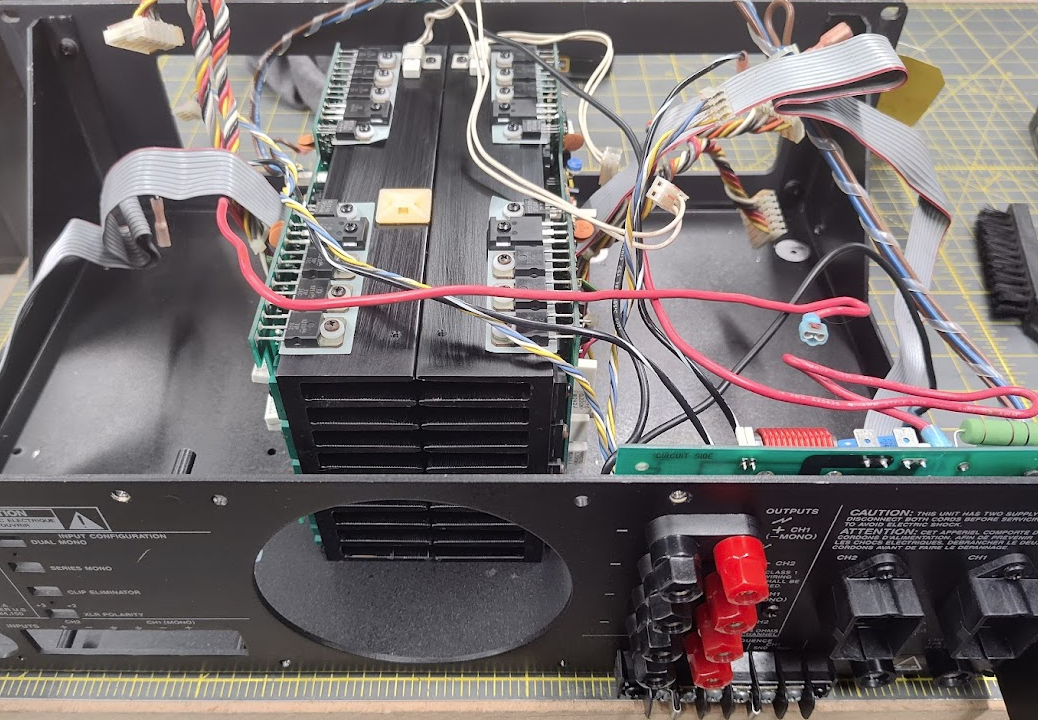
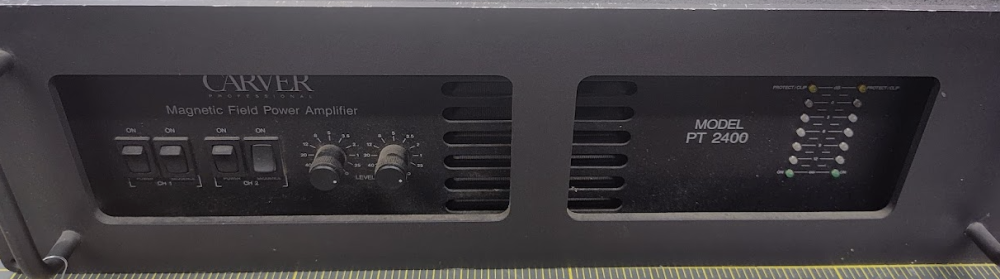
Carver PT-2400 restore
AndrewJohn replied to Nahash5150's topic in Nelion Audio's Vintage Audio Repair and Restore
Very cool, Greg. no worries on getting it up on the site. That sensitivity option will make a lot of folks happy! -

Carver PT-2400 restore
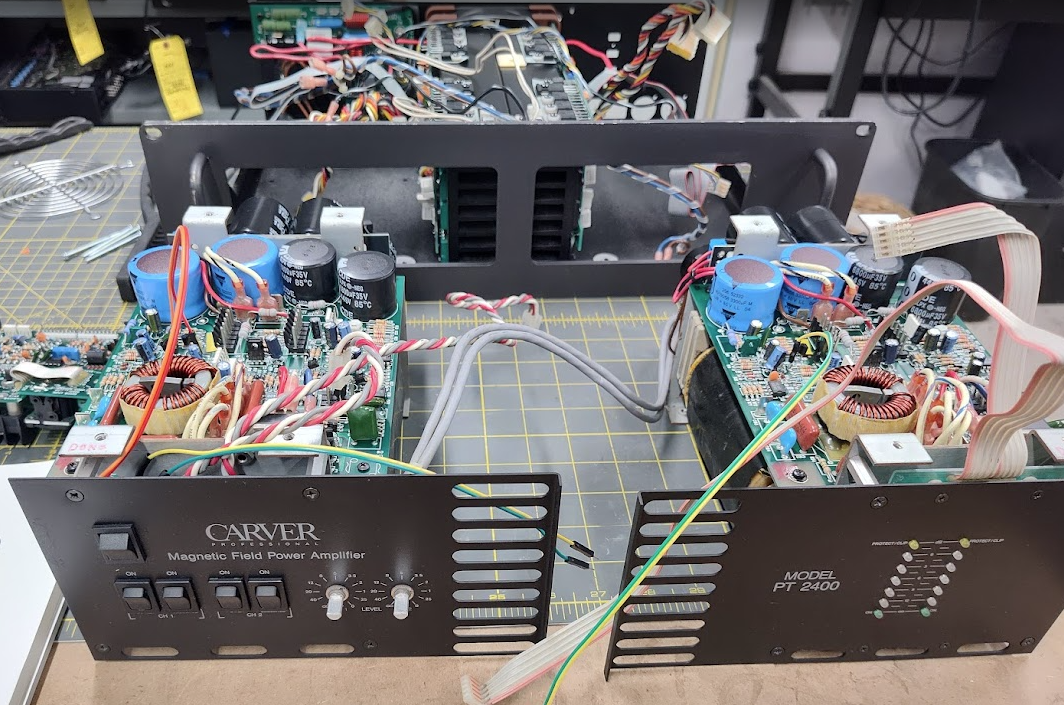
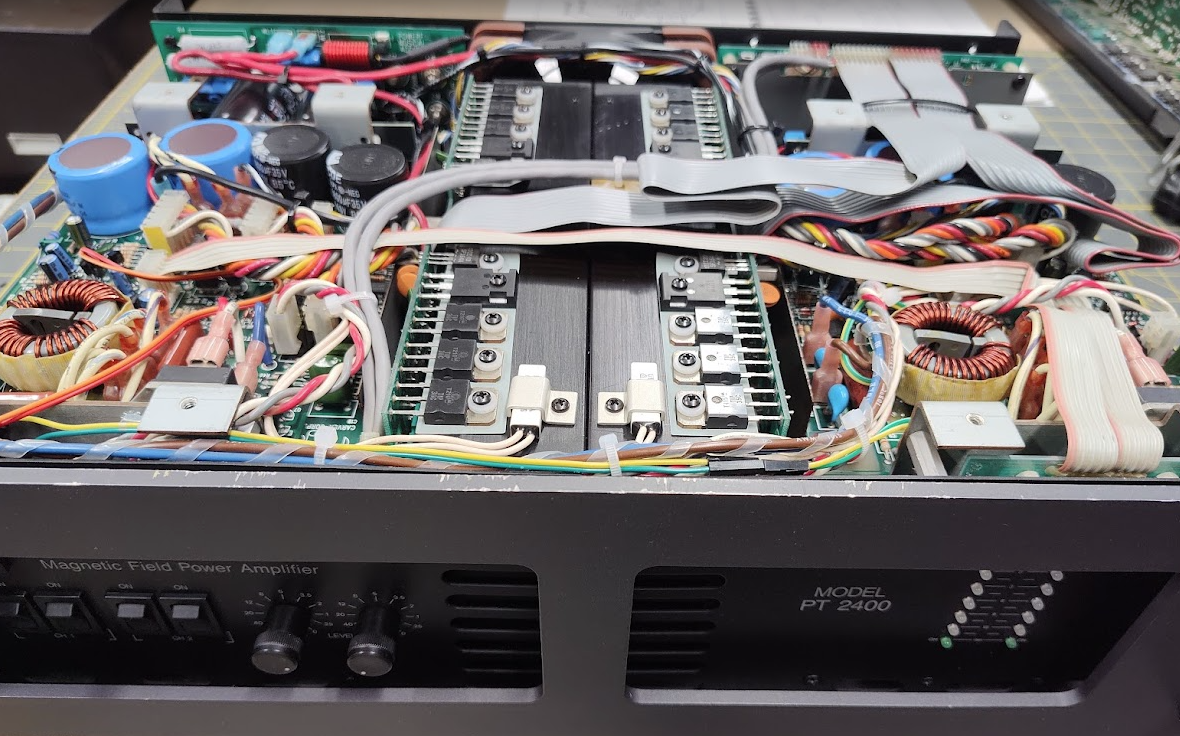
Nahash5150 replied to Nahash5150's topic in Nelion Audio's Vintage Audio Repair and Restore
The LED sensitivity switch will allow the LEDs to 'bounce around' or respond, at lower volume levels. You really have to be hammering it to get the LEDs to respond from the factory. Here's a comparison: Here's the LED power estimates into 6 OHMS: Indicator - normal / high sensitivity LED 1 - 20W / 1W LED 2 - 42W / 2.5W LED 3 - 72W / 4.5W LED 4 - 185W / 11W LED 5 - 330W / 20W Sorry - I don't have it on the site yet. -
Carver PT-2400 restore
AndrewJohn replied to Nahash5150's topic in Nelion Audio's Vintage Audio Repair and Restore
Super nice, @Nahash5150, Love seeing the process in images. @davidc is gonna' love this. Curious to ask, what does the LED sensitivity switch do? I did look on NelionAudio.com for a mod option description - may have missed it. Thanks in advance. -

Carver PT-2400 restore
Brian K. Totten replied to Nahash5150's topic in Nelion Audio's Vintage Audio Repair and Restore
Its the fine, exquisite details, of a service or restoration that matters! I am not sure how anyone can look at this thread, then say, "I am sending my amp to "Bob-the-builder" and expect this level of service, not to mention the killer warranty! Nailed it! Yall are superb! -
McIntosh 240 chassis replacement
Nahash5150 replied to Nahash5150's topic in Nelion Audio's Vintage Audio Repair and Restore
Yes - I think they are. As for the pre-tubes - no idea. But I had to provide the AU's cuz Bill didn't send me any! -
Carver PT-2400 restore
Nahash5150 replied to Nahash5150's topic in Nelion Audio's Vintage Audio Repair and Restore
Thank you! Scrubbed down with demineralized water. -

Carver PT-2400 restore
BobTFM35 replied to Nahash5150's topic in Nelion Audio's Vintage Audio Repair and Restore
That looks like a NOS amp!! Great job on the grill restoration. Ultrasonic cleaning? -
McIntosh 240 chassis replacement
BobTFM35 replied to Nahash5150's topic in Nelion Audio's Vintage Audio Repair and Restore
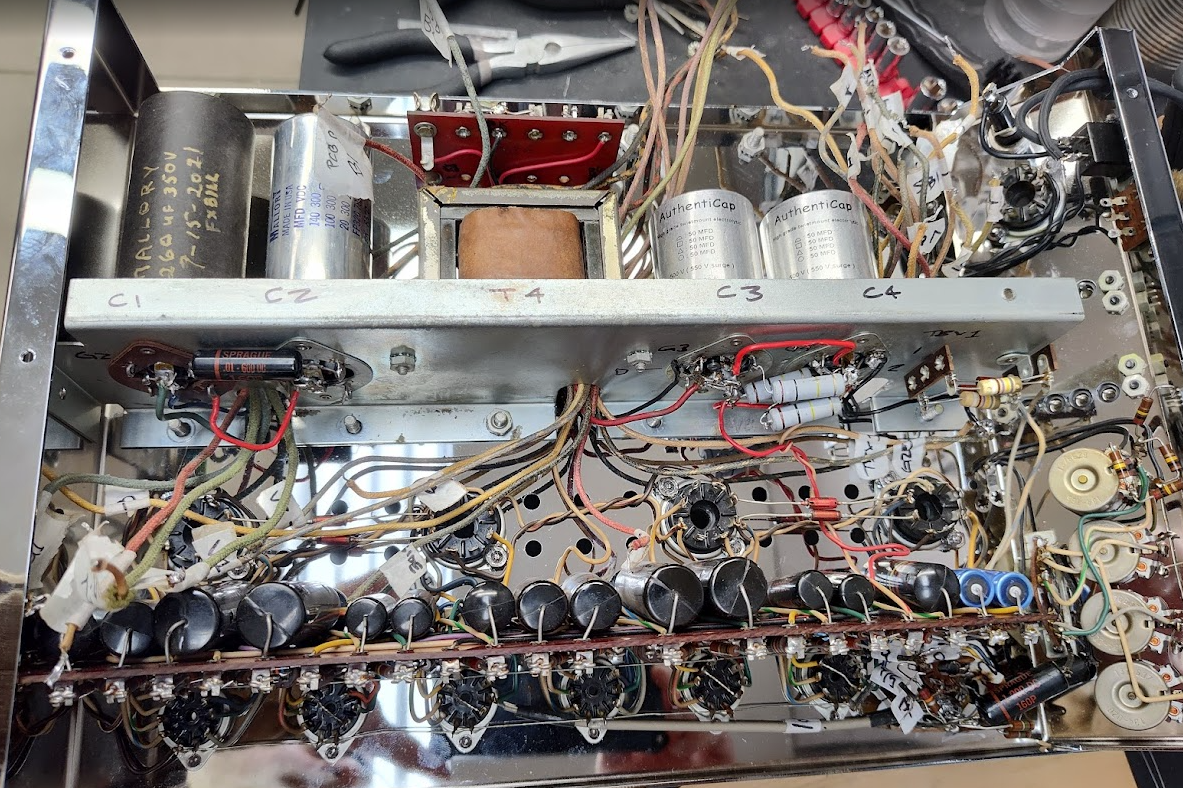
@Nahash5150 Well you did it!! A night and day difference. I really like how the old and the new blends together preserving, shall I say its history and still maintaining some of its vintage look. Looks like you had a very good starting system with all the numbering and tagging that I see. Just those wires poking out of the holes gave me anxiety just looking at them. I'm assuming that they are the original tubes? Interesting to see that the unit used 6L6. Just the other day Chris and I were testing the same 6L6, 5881 and a few other tubes out of his vintage guitar amp with a Sencore TC28. Like I said " You have this" and it came out perfect. Great looks and it beat the numbers. Excellent!! Excellent!! Excellent!! -
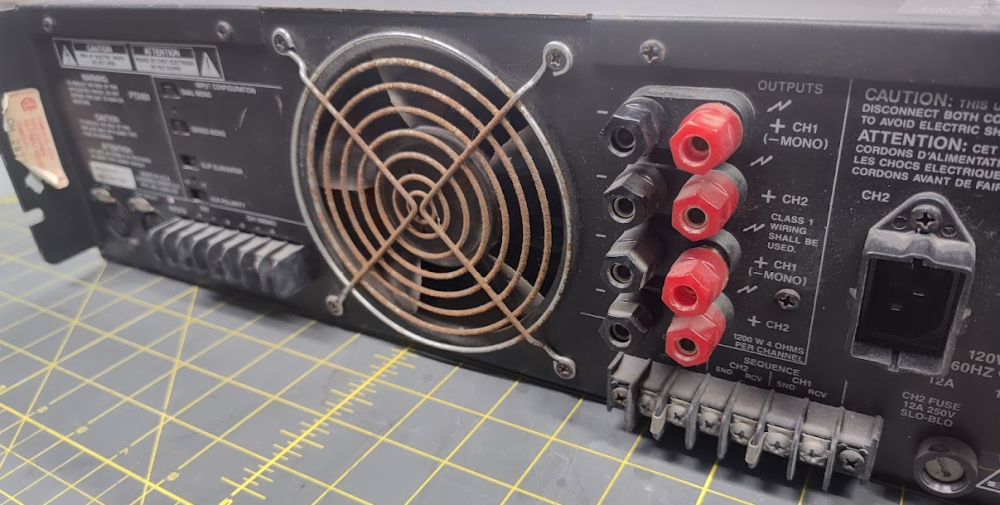
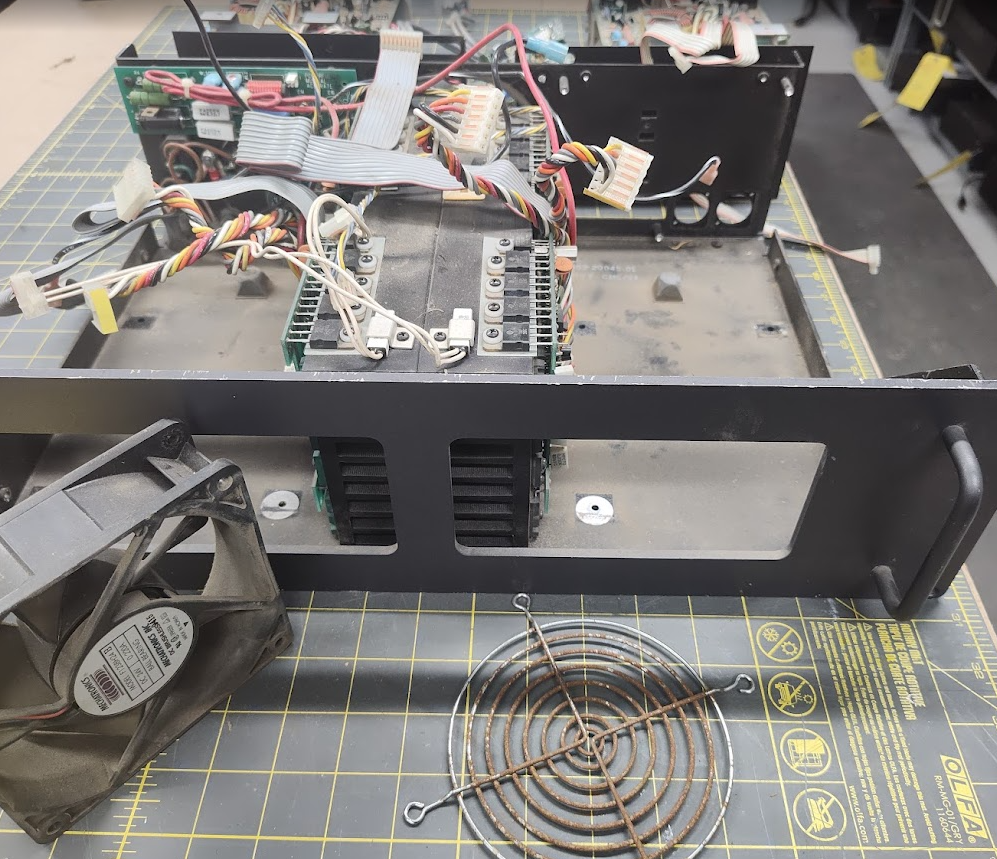
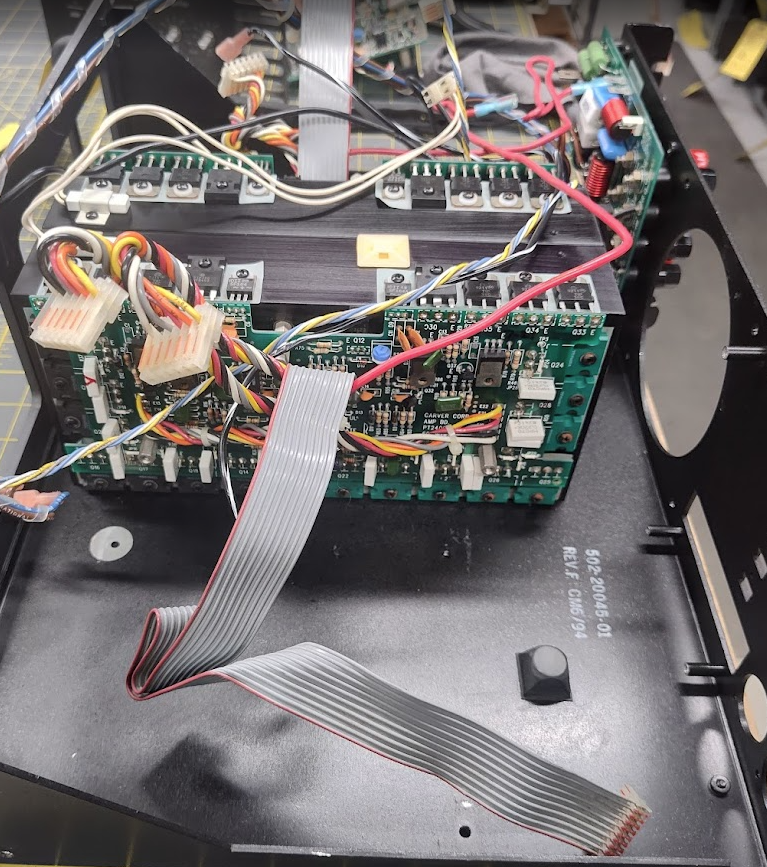
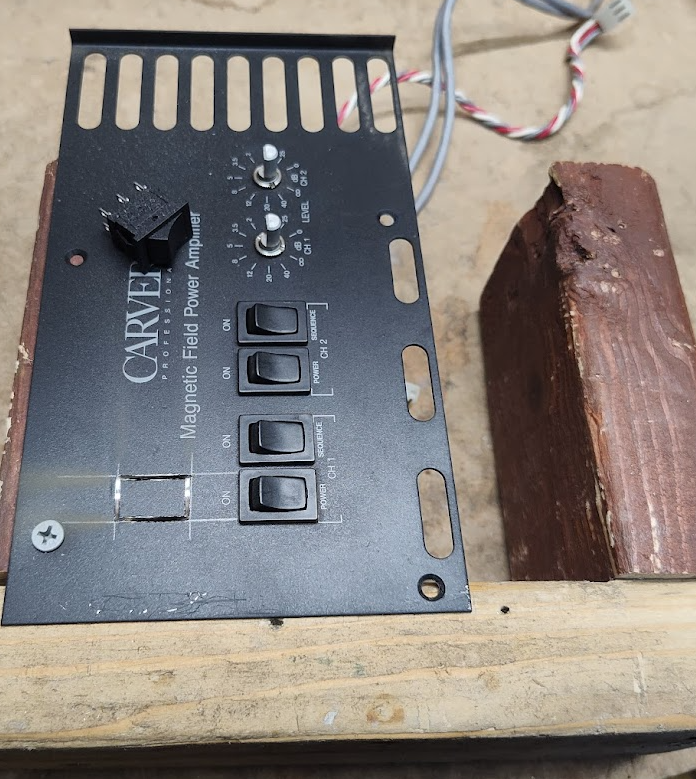
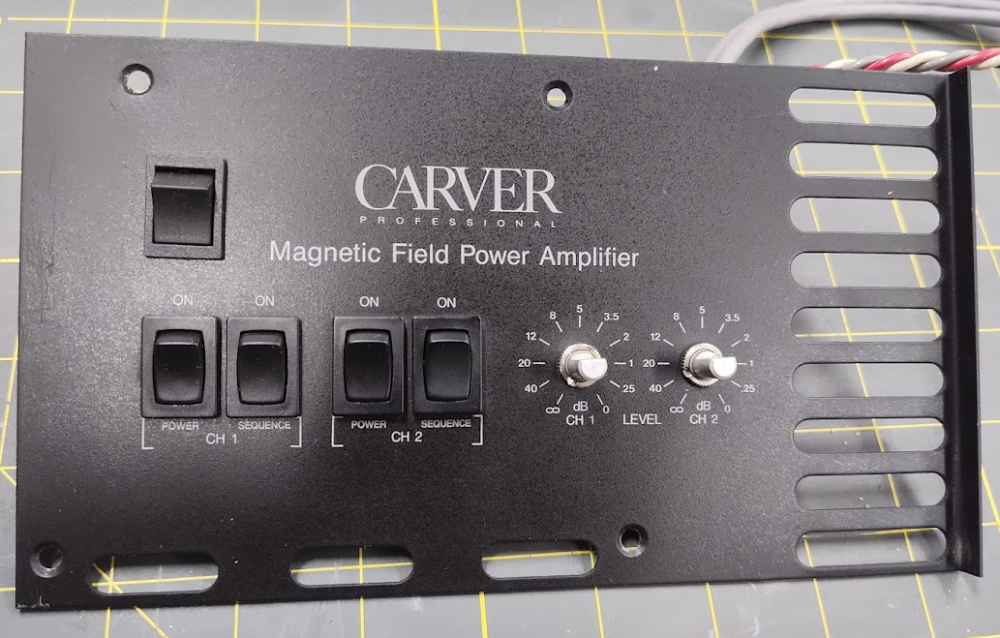
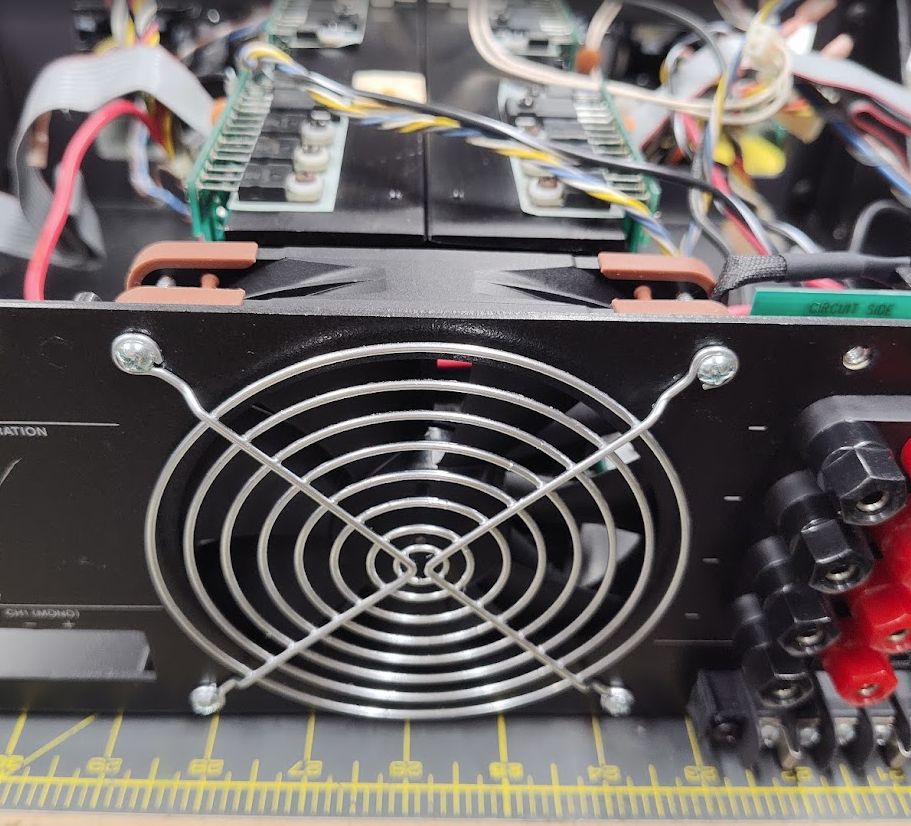
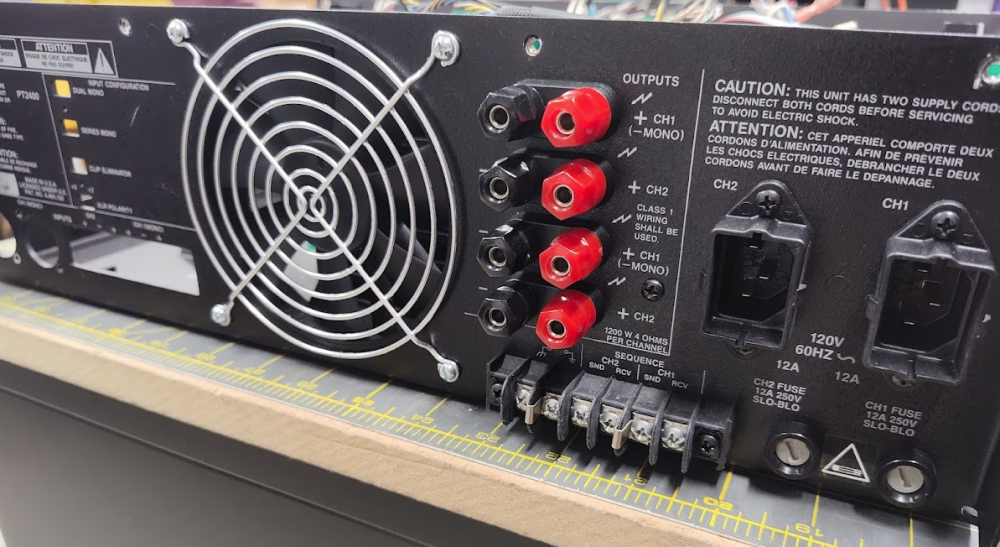
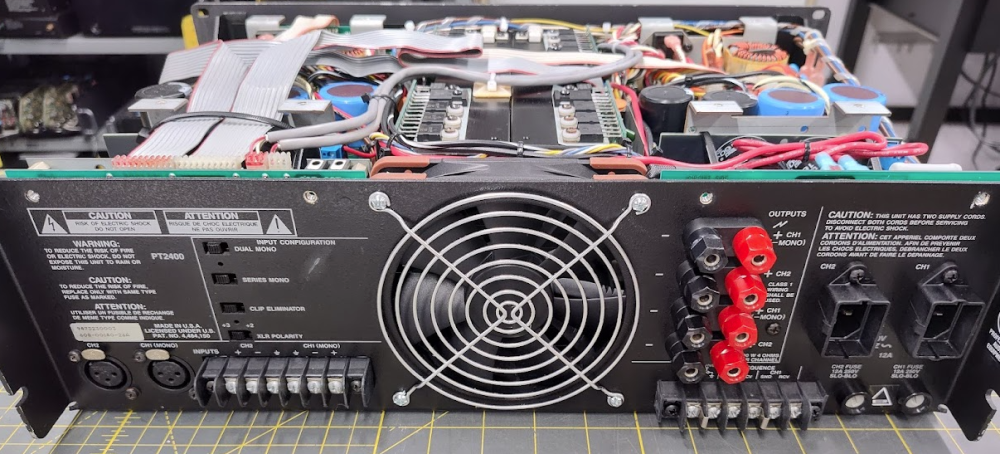
This is for @davidc. A typical dirty and rusty specimen! Decent shape. No severe burning so that's a great start. Tear down. Lots of dirt. I will take care of that rusty fan grill, and install a new quiet fan and turn down the speed to make it QUIET. Chassis cleaned up and tested. Had to replace some bad transistors. Typical. An LED sensitivity switch was requested, so I'm cutting one out here: Everything cleaned and rebuilt! New fan and restored grill: All back together: Best sounding 750W per cannel amp ever!


-
McIntosh 240 chassis replacement
Nahash5150 replied to Nahash5150's topic in Nelion Audio's Vintage Audio Repair and Restore
And a side-by-side: It's really hard to take pictures of this thing because it's like a mirror and I keep spotting myself in the shot!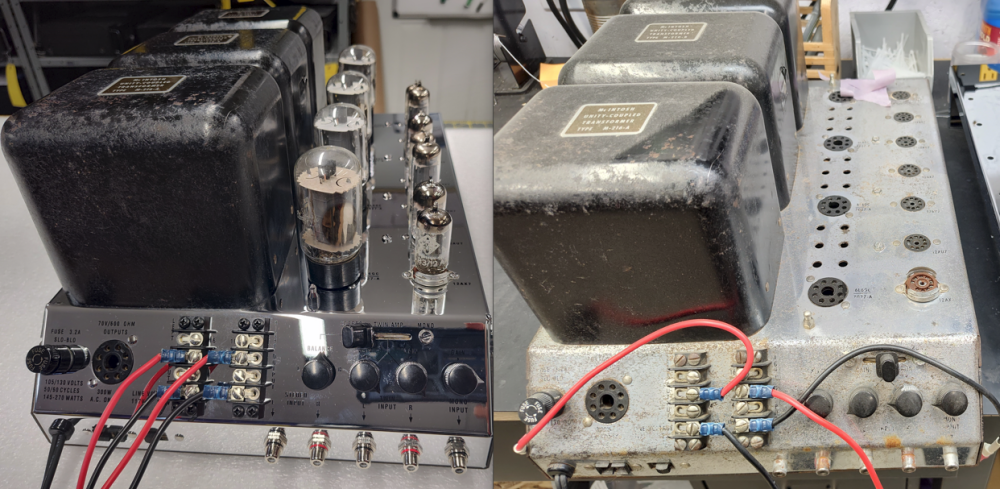
-
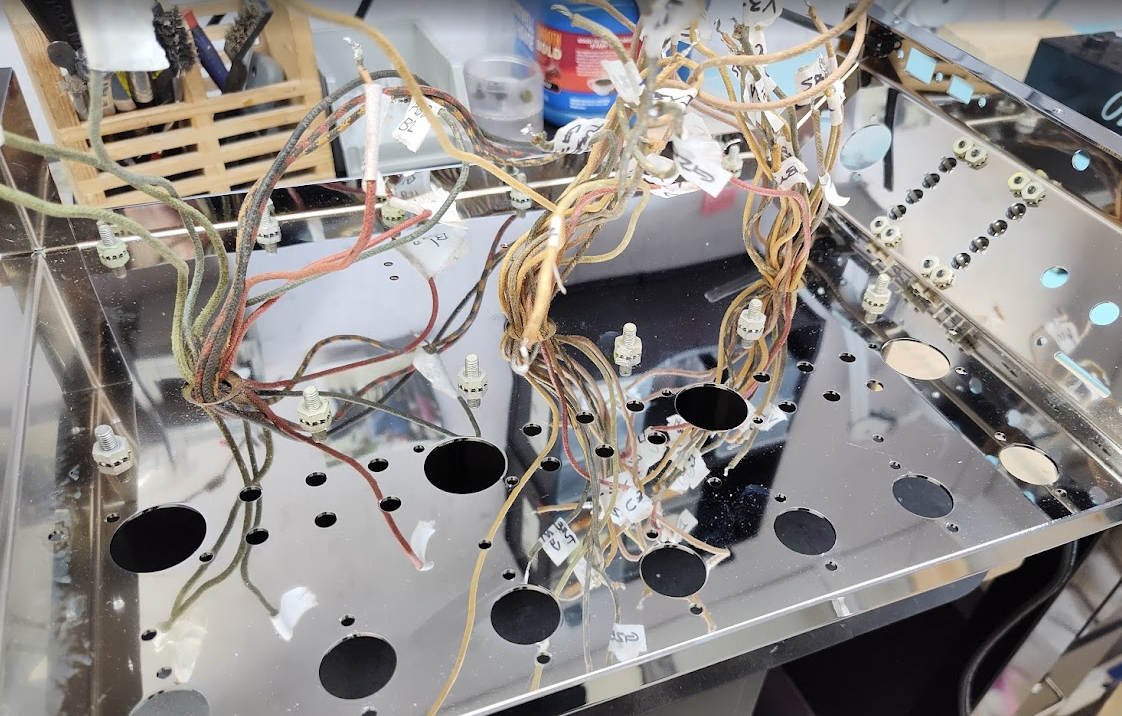
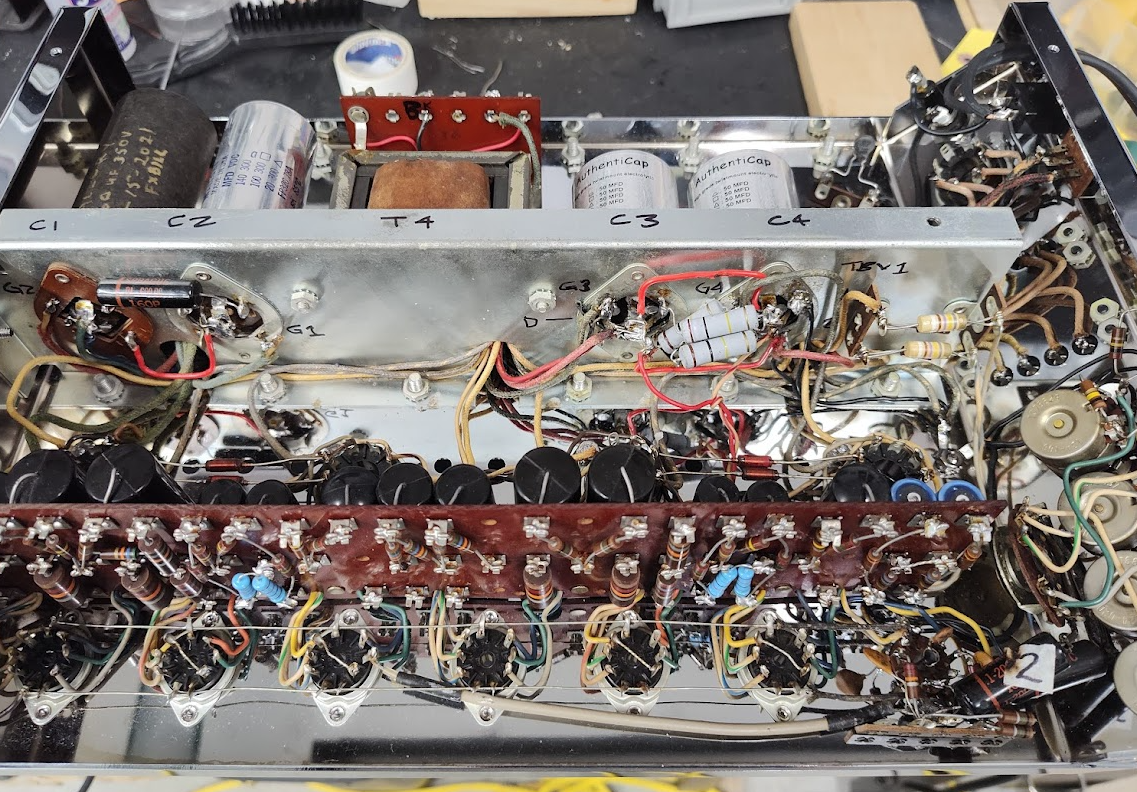
McIntosh 240 chassis replacement
Nahash5150 replied to Nahash5150's topic in Nelion Audio's Vintage Audio Repair and Restore
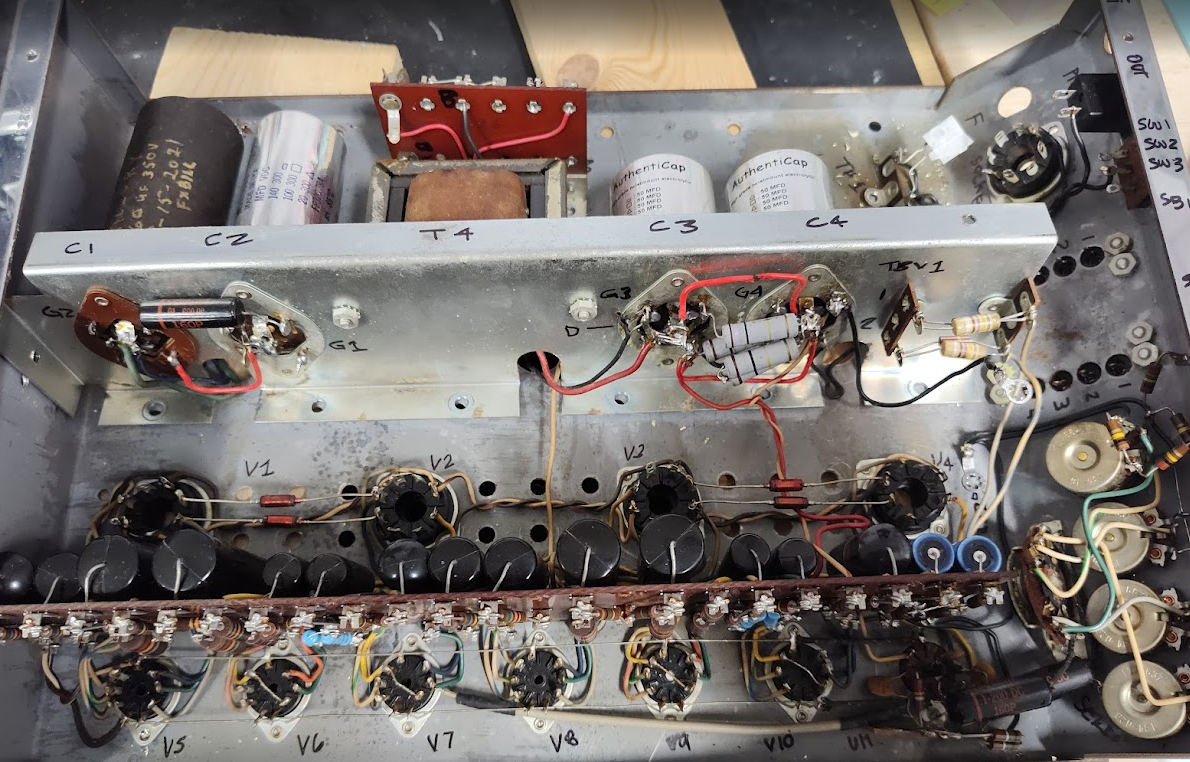
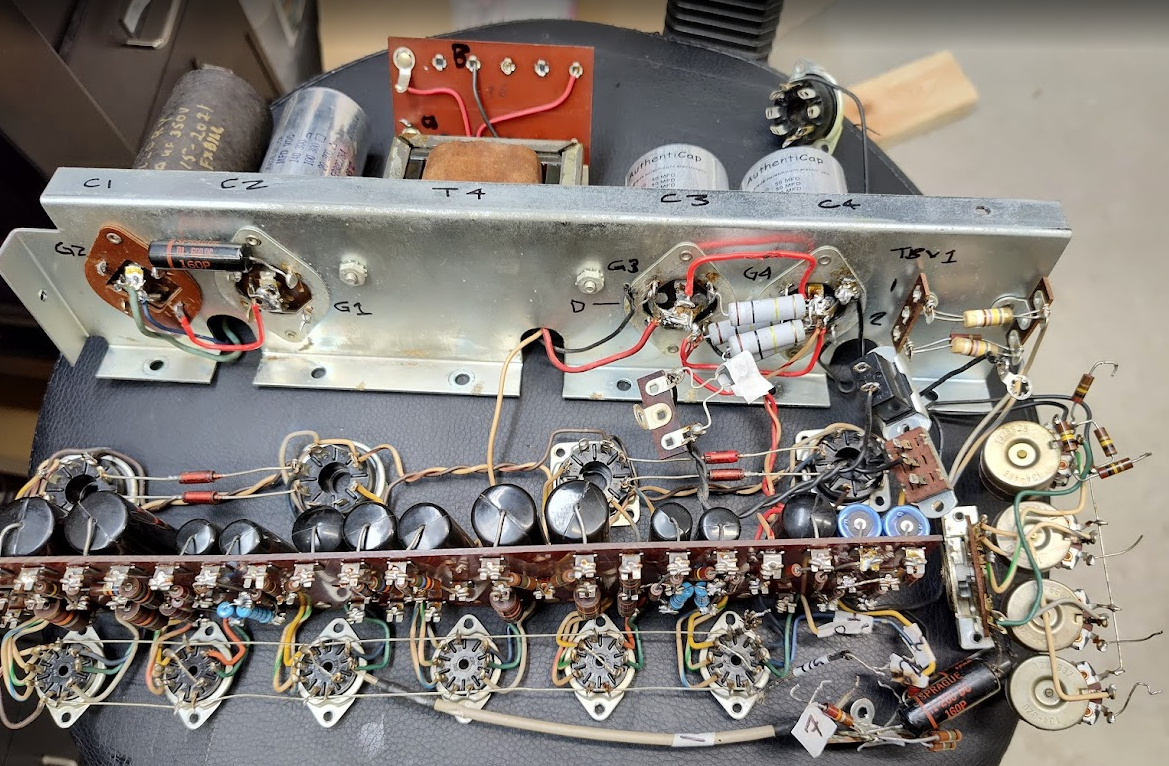
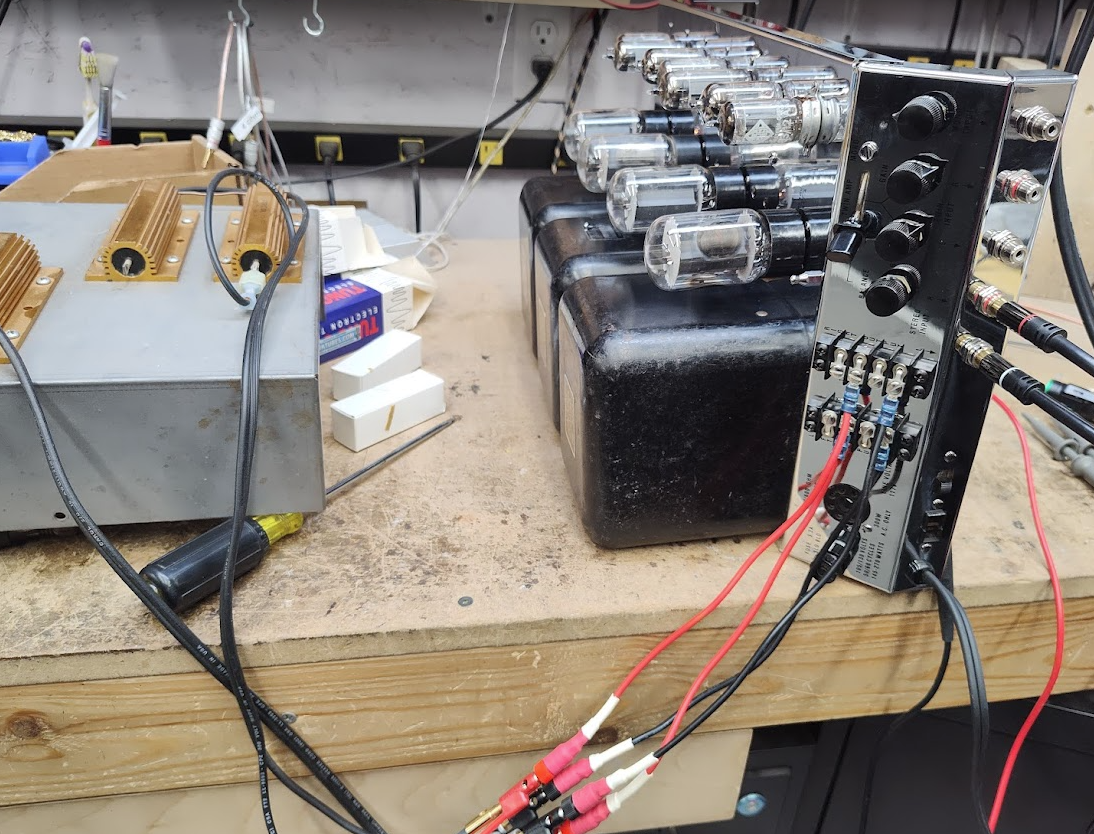
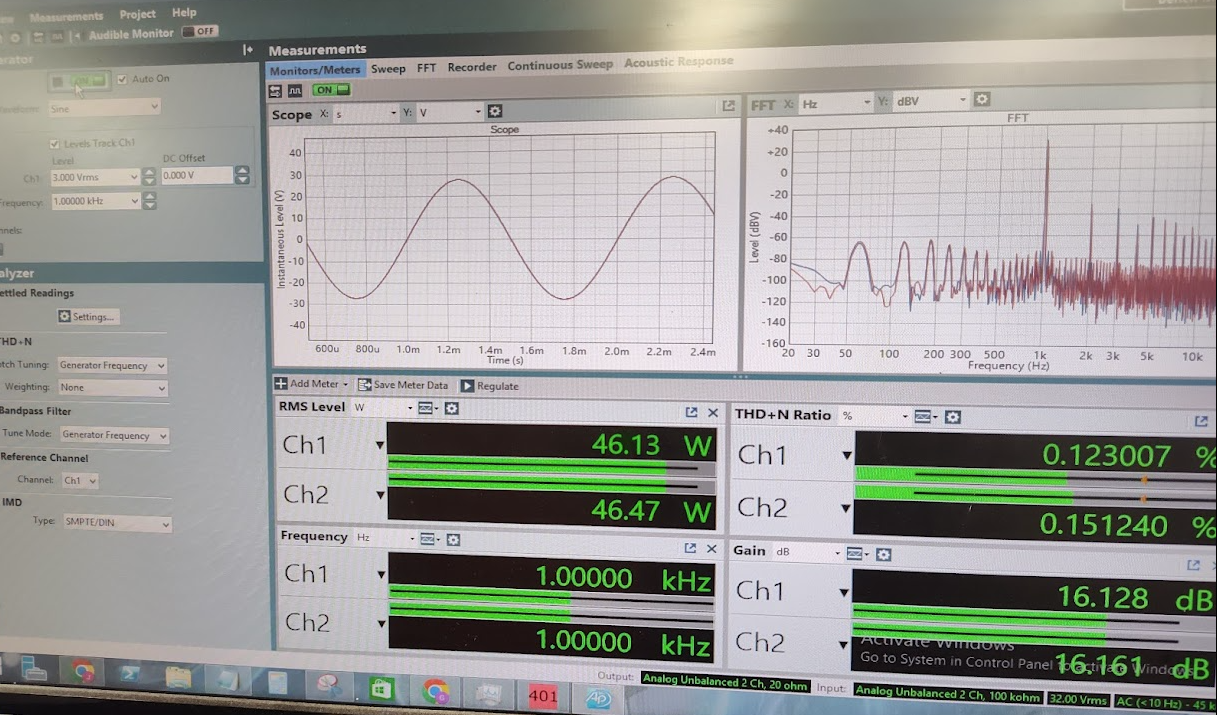
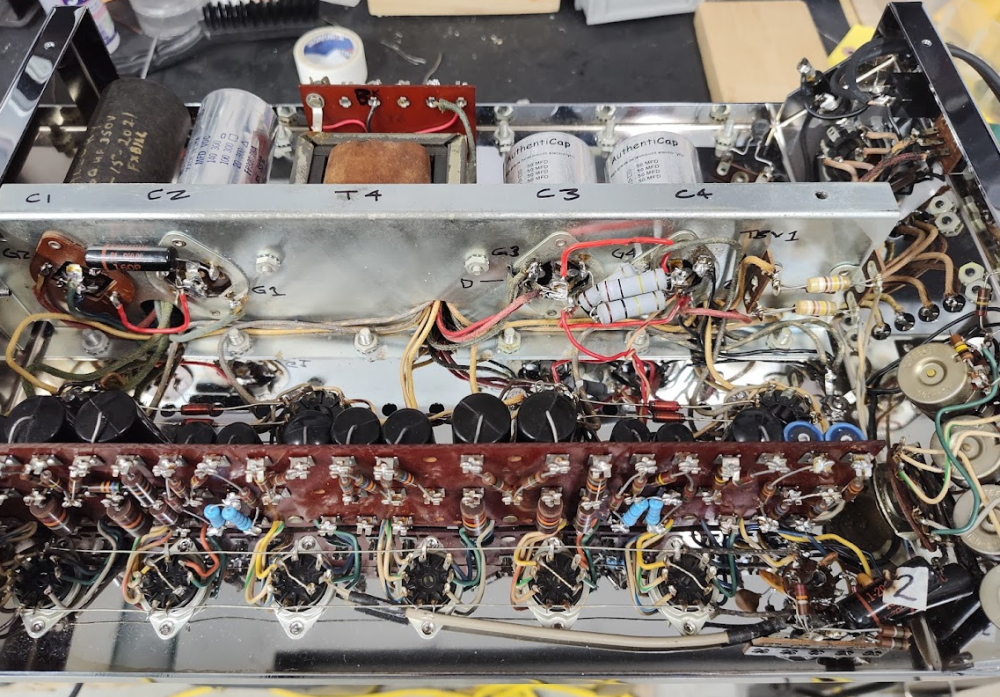
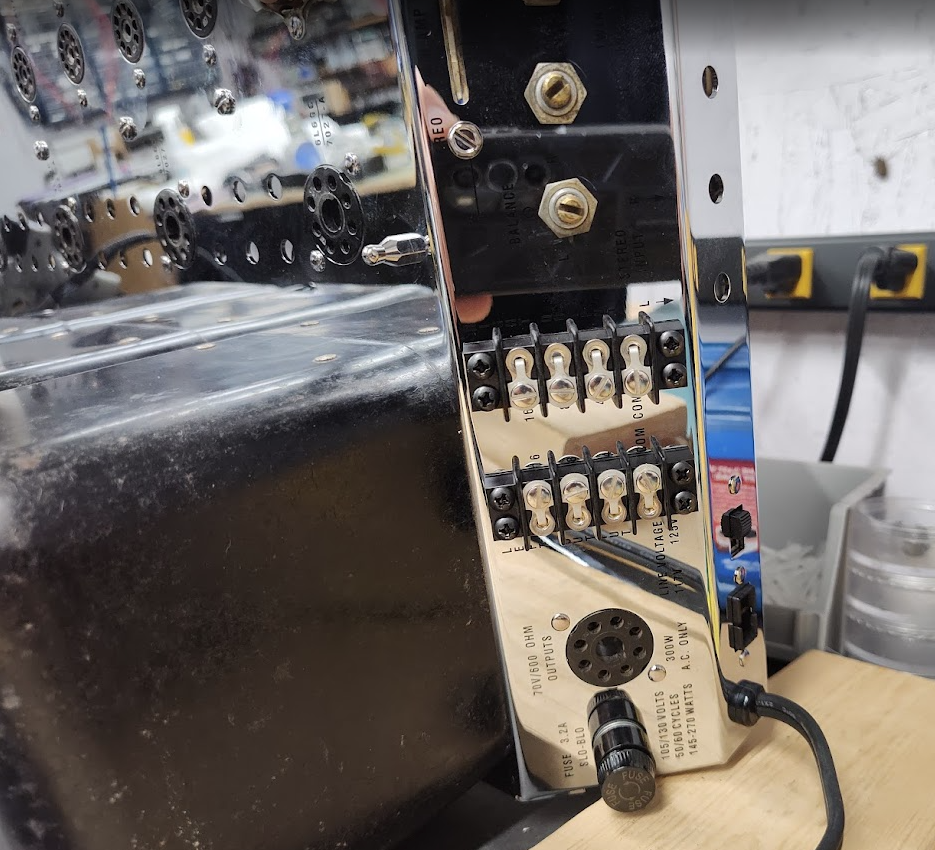
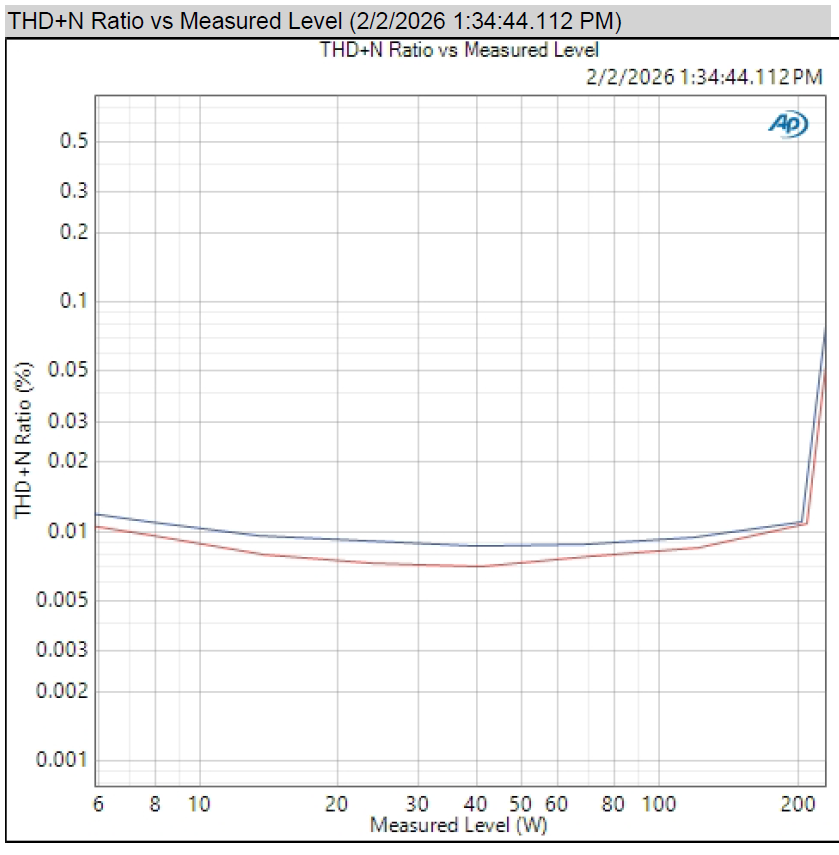
Transformer out! Parts of this thing haven't been seen by human eyes for over 50 years! Looking simpler with the transformer wires out. Its out!!!! Transformers through the new chassis. This was HARD. Each transformer is so heavy, and the wires are stiff and don't want to move, so getting each one set over the holes - both the wire entry and screw mount holes, is a real challenge. Riveted and screwed in - still a lot of soldering to do. Almost done. New power cord, new fuse holder, and I had to wait for the new RCA jacks because the stock were pressed into the chassis and they ain't comin out. New Speaker Blocks as well: Tubes in, and initial testing. It only has 16dB gain and a max power of 40W per channel, so I was quite shocked at how much metal it takes to make that happen - lol Test result after some tweaking. Spec is 0.5%, and it stays below 0.2% from 1W to 45W so we're good. I can make the THD change based on were I put the 6L6 output tubes, so matching is a factor on this topology. Some cutesy pics: I can look back on it now and call it fun... But it wasn't. HAHAHAHA!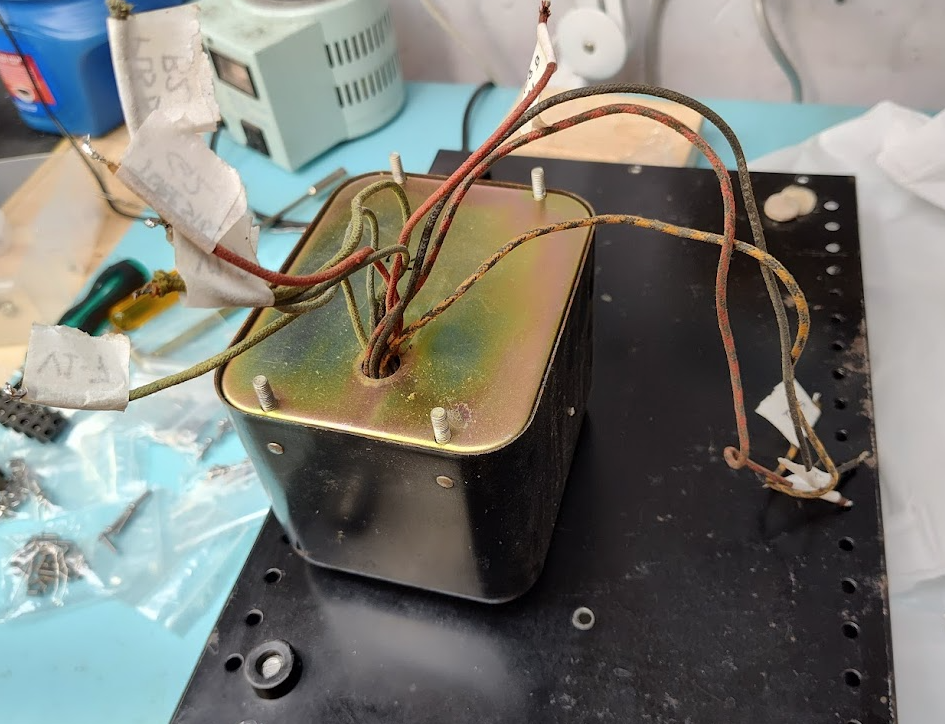


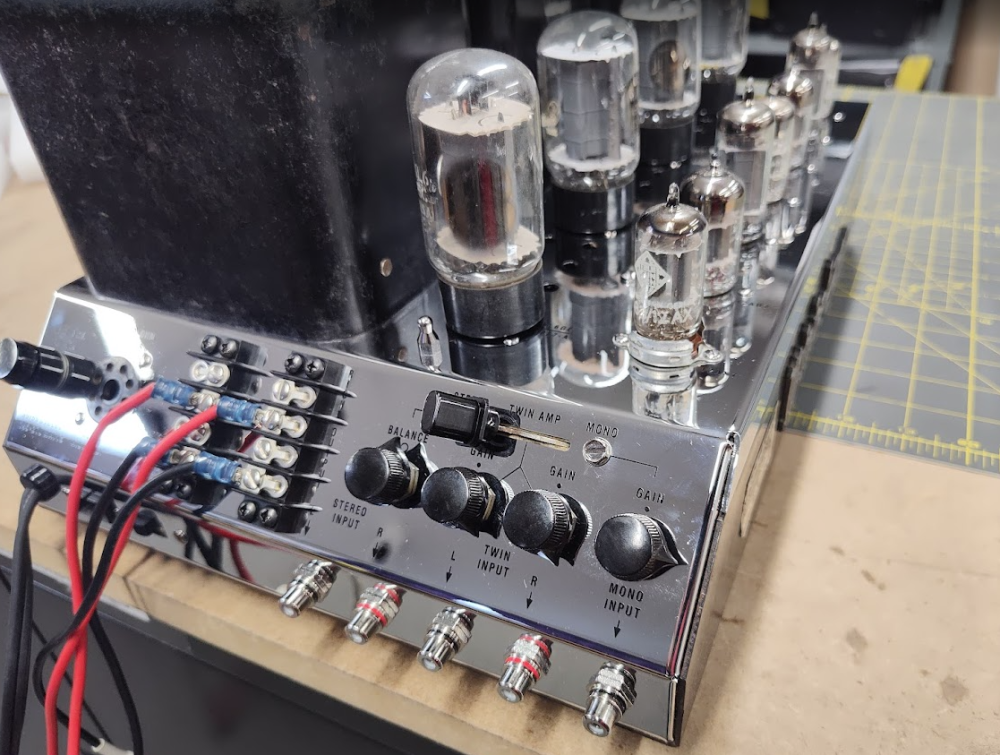
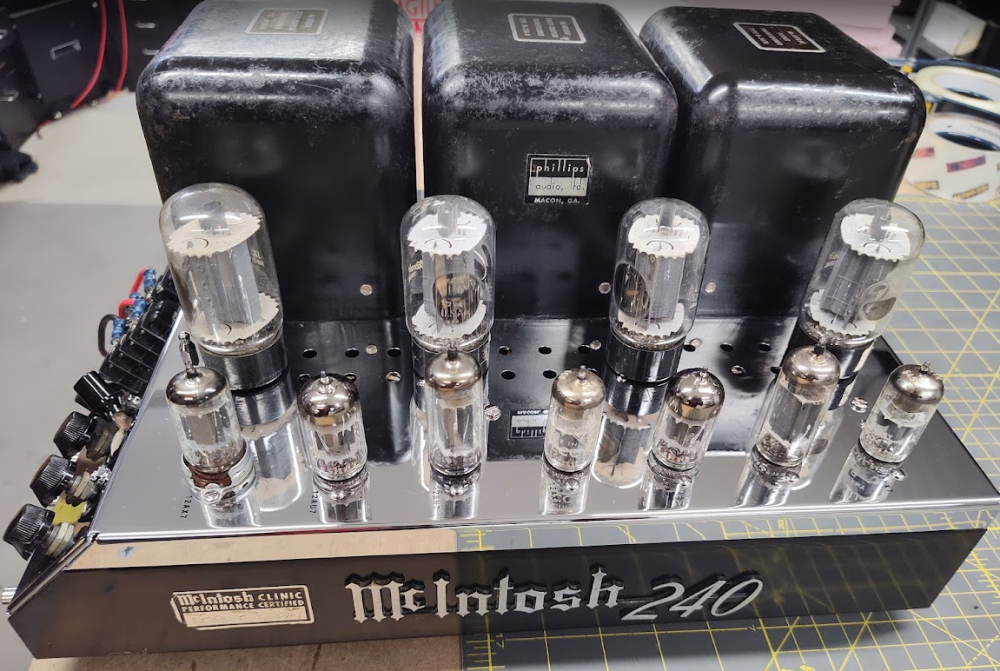

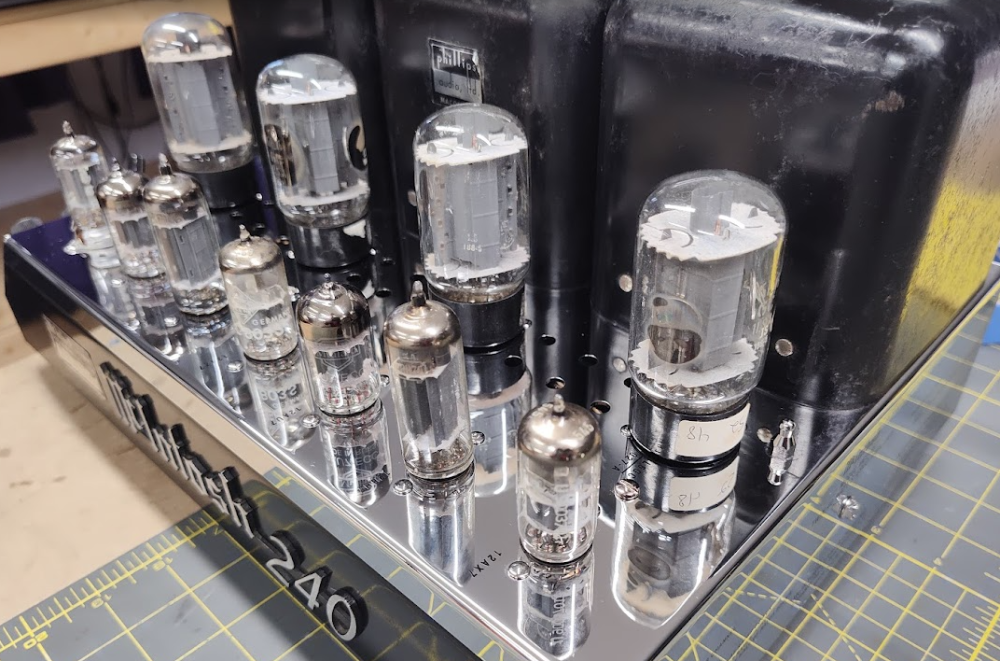
-
zg_strider joined the room
-
 .kap384 joined the room
 -
Duane joined the room
-
Jwooley01 joined the room
-

Gold RCA jacks for pre-amps
3M_Audio replied to Nahash5150's topic in Nelion Audio's Vintage Audio Repair and Restore
I have a C-16 in the stack waiting to be repaired and I haven't opened it up yet, so I'm curious as to what made this one so difficult? Any unusual parts that will be difficult to track down? -
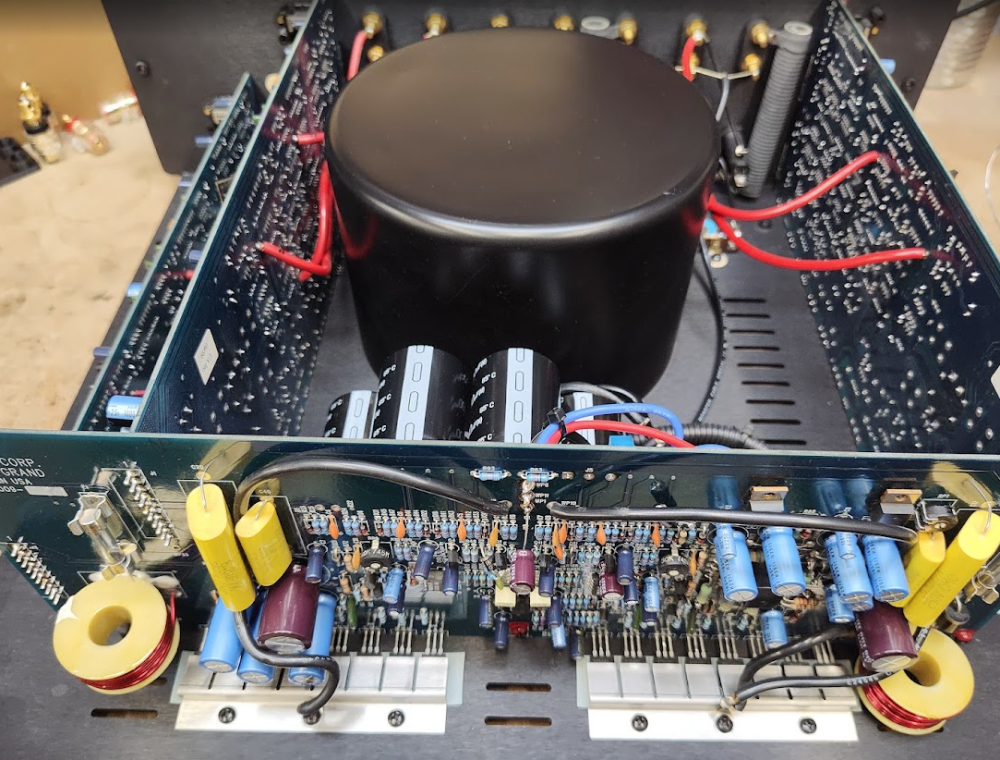
Tests great too!
-
Gold RCA jacks for pre-amps
Nahash5150 replied to Nahash5150's topic in Nelion Audio's Vintage Audio Repair and Restore
C-16 (this was torture!)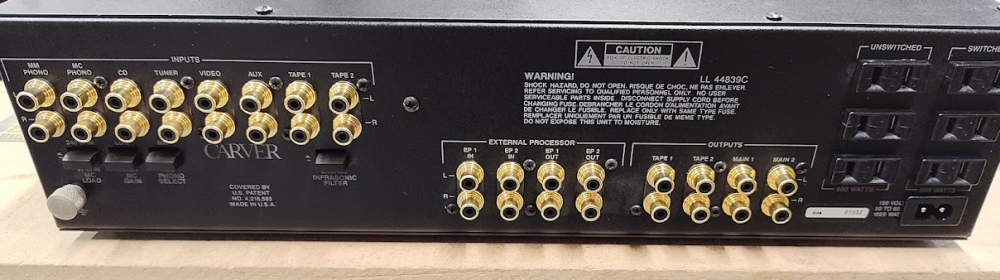
-
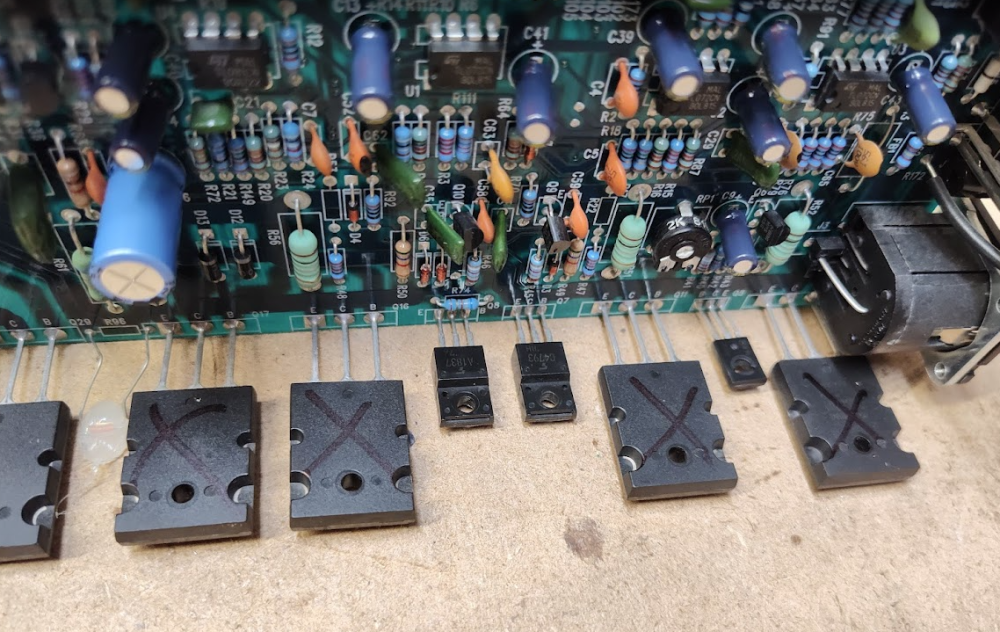
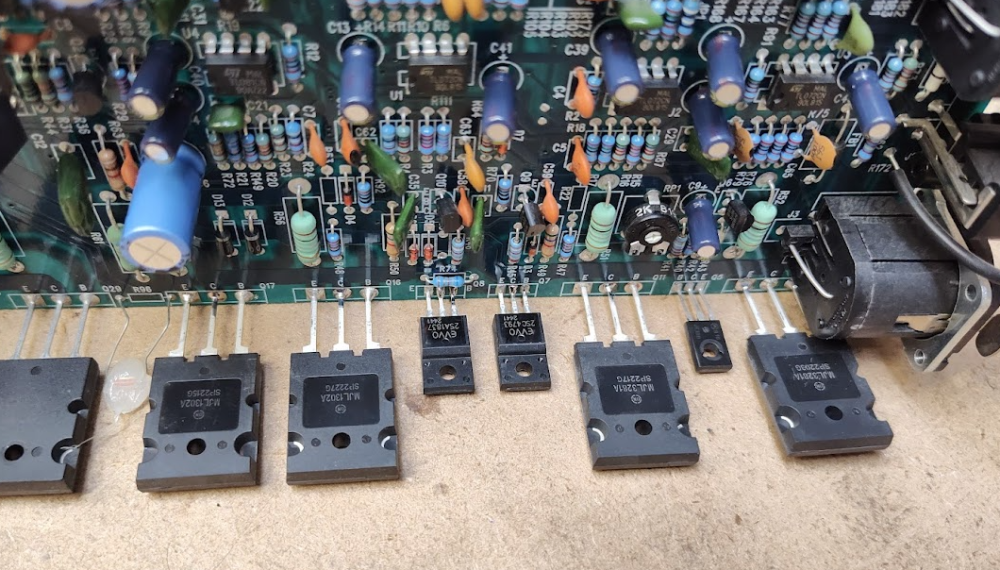
Bad bad bad! Thankfully, only a fuse and a pair if output transistors are bad. I replaced the whole stage though. All back together! New meter bulb and meter check, the cover is back on, and now a bit of faceplate cleanup Before: After:


-
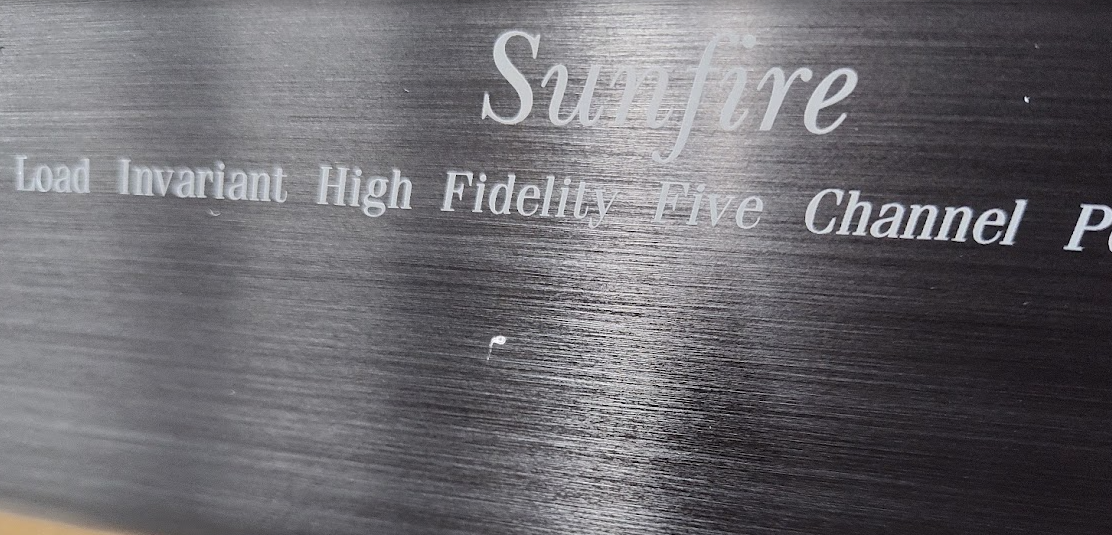
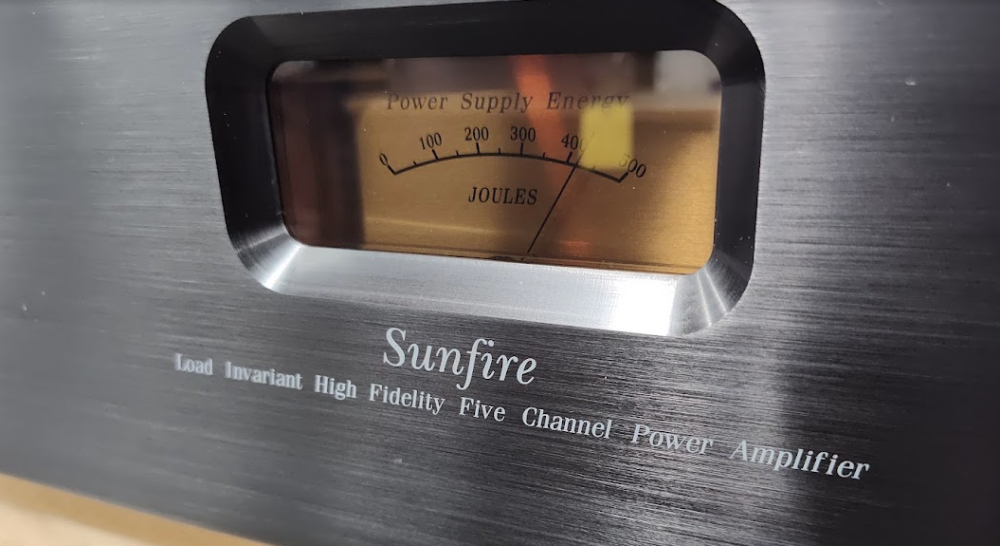
Not really typical. They fail as a result of a few things like a failed TDC, bad regulation (bad caps), cracked solder joints, abuse, etc. The problem is that Sunfires don't shut down from a fault - they just mute. So power stays active during a failure until it becomes a light show. The fuses rarely save the day...they only prevent complete meltdown (hopefully).
-
McIntosh 240 chassis replacement
BobTFM35 replied to Nahash5150's topic in Nelion Audio's Vintage Audio Repair and Restore
Positive energy coming your way!!! -
McIntosh 240 chassis replacement
Nahash5150 replied to Nahash5150's topic in Nelion Audio's Vintage Audio Repair and Restore
Yeah - 20 hours is at the low end of time. I will not make any money on this. I have bills like anyone else - it's not about making money, it's about being responsible with it. I have to be very careful what work I take. If a project gets too demanding of my attention, other clients suffer. And I certainly do not want a shop full of unfinished projects that are over a year or two old. I told myself I would not do that... Anyway, fxbill is a great salesman. Looks like I'm doing it. For team Carversite...here we go... -
McIntosh 240 chassis replacement
3M_Audio replied to Nahash5150's topic in Nelion Audio's Vintage Audio Repair and Restore
I agree with @BobTFM35 regarding all the parts. The question in my mind would be the labor. There would be a *lot* of it. Your quote (from the customer, I assume) used the word "just". That would set off some alarms in my mind as it would indicate they are thinking it's a simple job that might take a couple of hours. I don't work very fast, but if I was estimating labor for the project I think I'd be at least 20 hours. Would the customer be OK with that bill? I bet they'd be shocked when they heard the number. Still, it looks like it would be a fun project. I have a soft spot in my heart for that vintage point-to-point wiring. It brings back memories of old Dynaco kits. -
McIntosh 240 chassis replacement
BobTFM35 replied to Nahash5150's topic in Nelion Audio's Vintage Audio Repair and Restore
Greg @Nahash5150 I don't know the back story on why this amp is on your bench. Lets say, its not a customer, but something that you sourced for your own use. If it was for a customer, I might have written the following differently. I did a little research on this amp and I've come to this conclusion. I just hope that I can explain it clearly. First the going price for this model, depending on the condition is maybe 3500 to 5000 (correct me if I'm wrong). That was the asking prices on ebay that I viewed. For discussion purposes lets say I can flip it for $4000.00 and I spend no more than 1200 for parts, don't know the bench time required so I can't factor that in, but it could still come out to be a nice profit. One of my first decisions is on availability of spare parts. You have a very nice Chrome chassis to work with. The vendor that I found for that chassis (and possibly the same one that the chassis was sourced from) also has some very nice reproduction pieces, such as the decals for the transformer covers and either a silver or gold badge 240 badge. For you sourcing the tube sockets, correct wire color and size would be no problem. The other sockets or holders for the metal caps (or whatever they are) I feel that you have the abilities to source them. The pots, depending on their condition, might take some reconditioning. Might need to see if replacements are available. I do know that for the dynaco amps there are a few vendors offering parts for restoration so maybe this is the case for the 240 amp. No doubt you have the wiring diagram for this unit so that would be a great source of encouragement to start with. I might start placing as much on the new chassis as possible such as the tube sockets, pots, and speaker terminal strips, some preliminary wiring with lengths long enough to be later adjusted, thus using the original chassis and schematic as a guide. I do know that you not only have the correct equipment but also the knowledge and experience to tackle this endeavor with a systematic approach, and that in Itself gives it a way better chance for success. Enough encouragement? You have this. -
McIntosh 240 chassis replacement
Nahash5150 replied to Nahash5150's topic in Nelion Audio's Vintage Audio Repair and Restore
Correction - FxBill worked on it and he says it works...so...that is a bonus! -
NEW! No Brainer! The new one looks so sweet!
-

McIntosh 240 chassis replacement
Charlie replied to Nahash5150's topic in Nelion Audio's Vintage Audio Repair and Restore
If it were my decision I wouldn't touch it; too many booger solders and shade tree work going on...