
Half Life
-
Posts
307 -
Joined
-
Last visited
-
Days Won
8
Content Type
Forums
Events
Articles
Downloads
Gallery
Store
Everything posted by Half Life
-
Steve Howe Clap
-
Brook Williams Frenzy at the Feeder
-
 Sold! I was going to refresh my C-1 myself and do the Bill D mod. After hearing this, I'm going to hold off on doing any of the C-1 work myself and send it to you guys. But I'll wait a few weeks after I get my M-1.0t back from your shop. I want to enjoy that for a bit.
 -
Intriguing idea! I'm especially interested in direct streaming to my C-1. Without giving away any secrets, how would it differ from something like this (I currently use one): https://www.amazon.com/dp/B016NUTG5K?ref_=ppx_hzsearch_conn_dt_b_fed_asin_title_20 Lastly, in your minds eye, when do you see this available to the general public? Definitely a cool idea!
-
One more from my Dad: "If a man can hold a shovel, a man can find a job." He taught that to my younger brother and I as we were entering our teens. It proved to be a good lesson on self-sufficiency and strong work ethic.
-
One of my favorites: "Start with nothing, stop at nothing."
-
"Can't, is can too lazy to try." - my Dad
-
Hello. Let me introduce myself
Half Life replied to 77targa's topic in The Welcome Shop (Please read first)
Welcome to the site! Enjoy your stay! Nice suite of equipment you have there. -
Thanks for posting the video! Awesome tips, tricks and best practices! I've never attempted a repair like this but watching this have given me the confidence to try it. I've held onto a pair of Coral BX-33's my Dad bought in Japan in the early 70's. I've always wanted to restore them and now I will. Appreciate the "kick in the pants"!
-
Thanks all for the nice comments! I truly love how these speaker sound. My TFM-15 quickly gives up when trying to drive these (at somewhat greater than reasonable volume 😁). The Yamaha M-80 gives a little more headroom but not much, still sounds good though. Unlike in the "Regrets ...." thread, these will not "depart the pattern" like my Bose 601's did. The Maggies are hear to stay (pun intended).
-
The restoration kit also comes with new speaker frame socks to complete the package. This was definitely a labor of love. I knew of Magnepan's during my late teens and was always fascinated by the imaging and crispness of the sound. They were always way out of my price range back then. I got them from a local guy that owns a sign shop where I get my pinball machine cabinet decals printed (another hobby and another story). Through my pinball machine restoration hobby, he found out that I was an electronics tech and asked if I could fix one of his sign printers, which I was able to do. He then asked if I worked on audio equipment and I said that I could and had recently brought a Yamaha M-80 back to life (cursed Sony glue). His audio gear was in the loft above his shop. Upon waling into his audio room I saw the Maggies and said, "Wow, you have a set of Magnepan speakers"! He asked how I knew about them and told him the story. Fast forward quite a bit, I fixed a power supply in one of his preamps and he gave me the Maggies for free. Since that time we have traded skillsets, he'll ask me to fix a piece of audio equipment and I'll get free pinball cabinet decals printed. Can't wait to get my M1.0t back from Nelion. With the mkii Opt 002 upgrade, I'll have something that can do the Maggies justice.
-
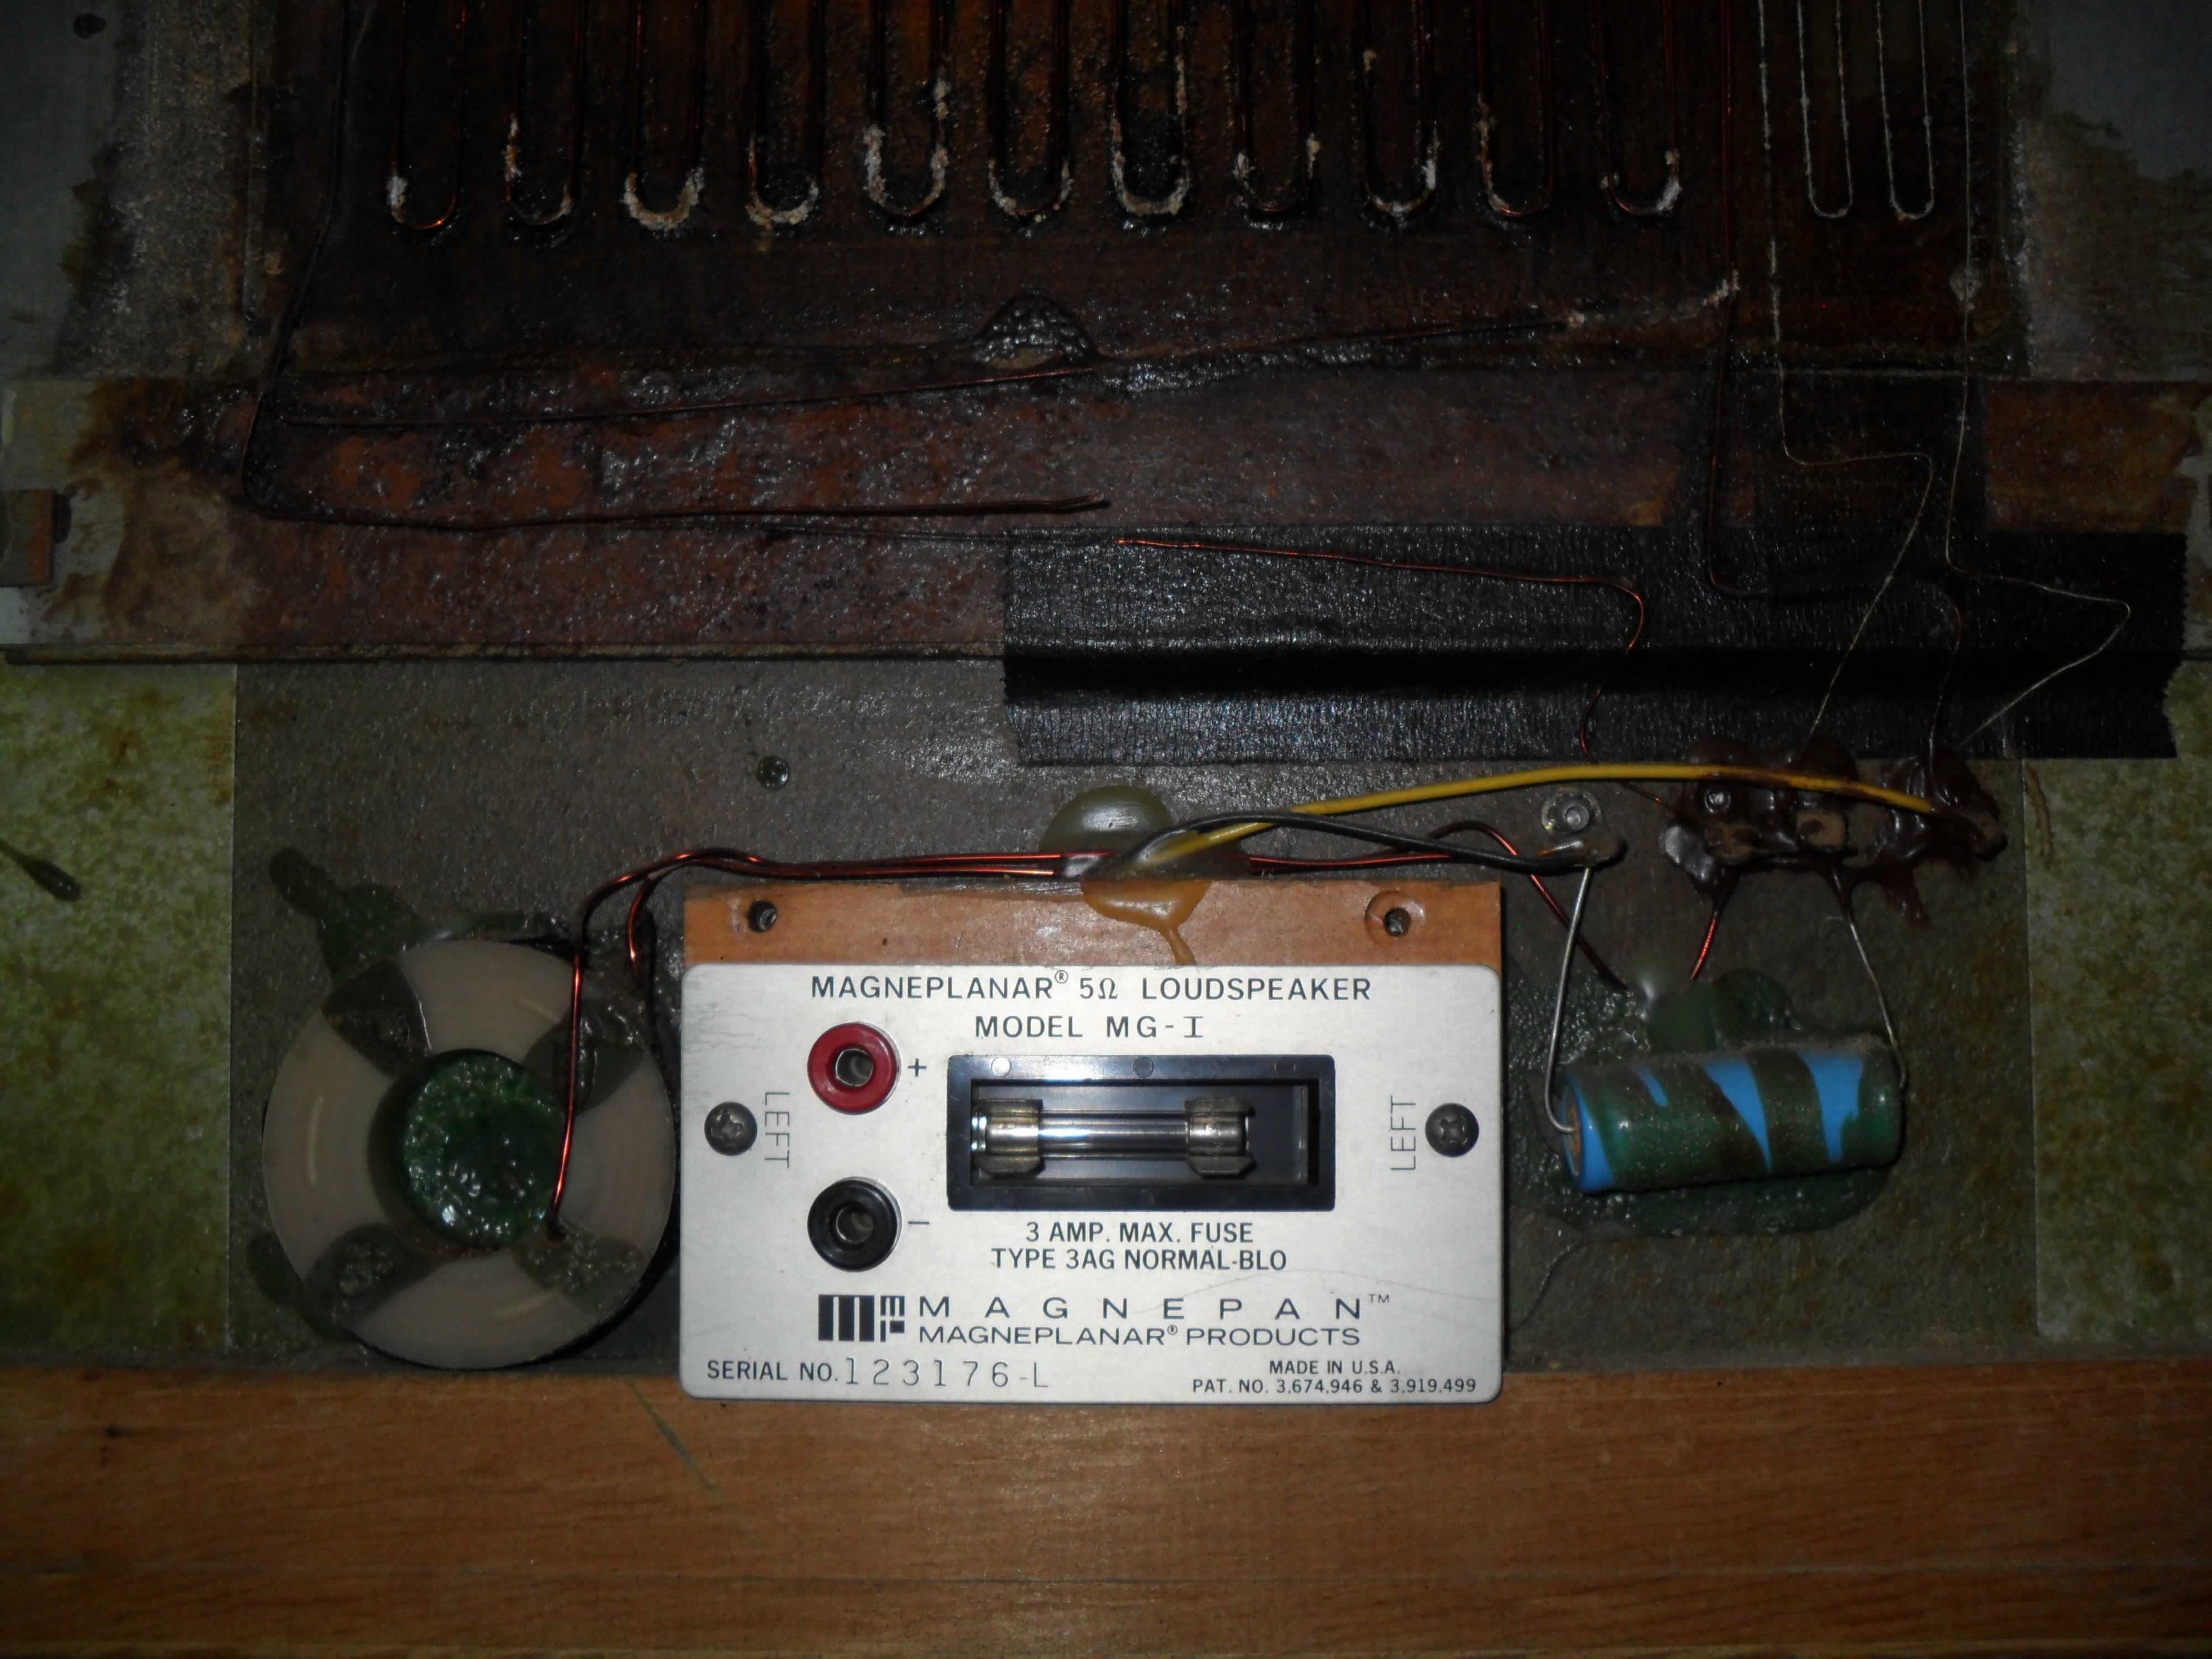
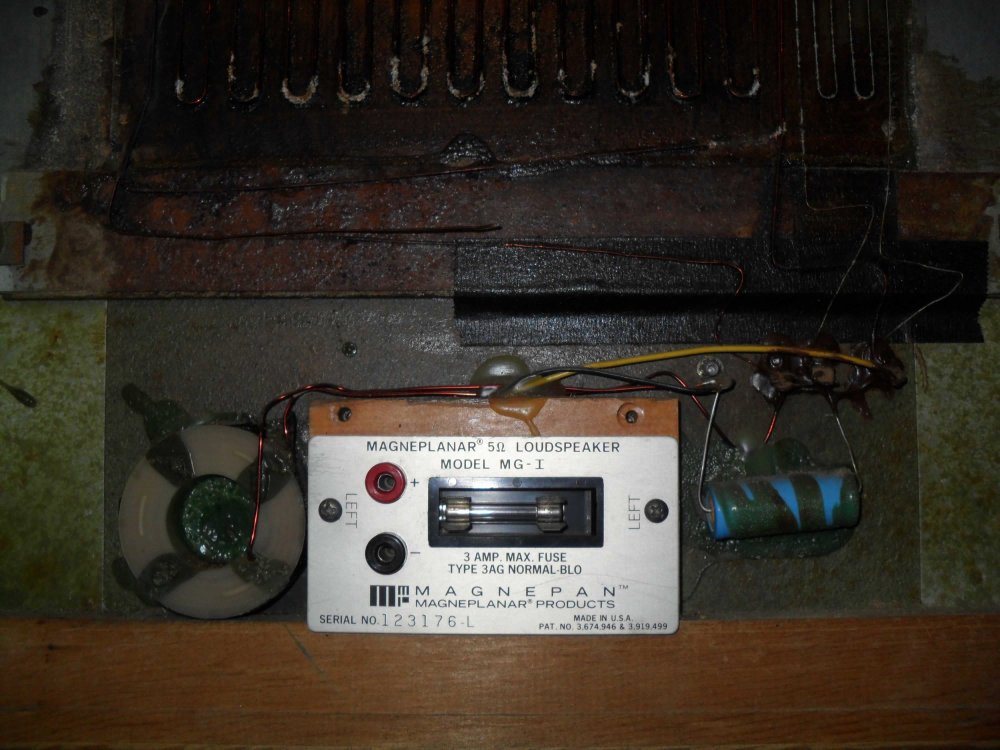
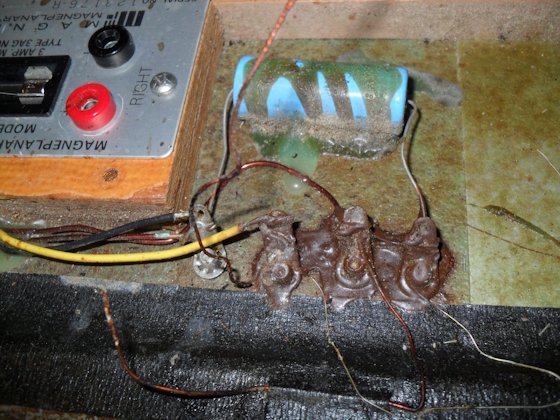
The crossover actually consists of a 0.33mH coil and a 12mfd capacitor (although the schematic calls for a 13mfd capacitor). 1st pic is the crossover in its original glory 2nd pic is the schematic
-
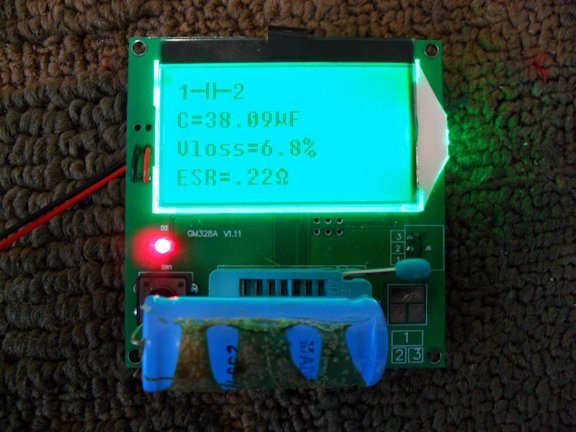
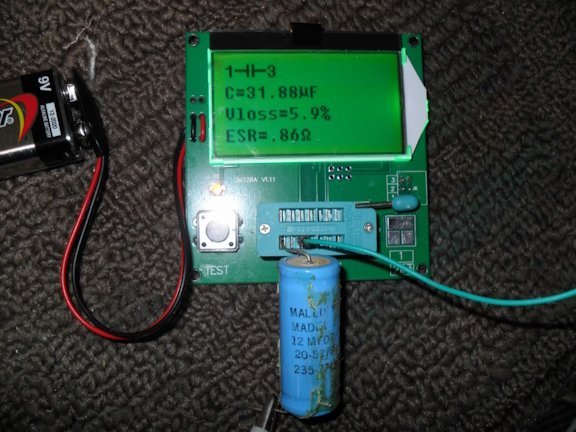
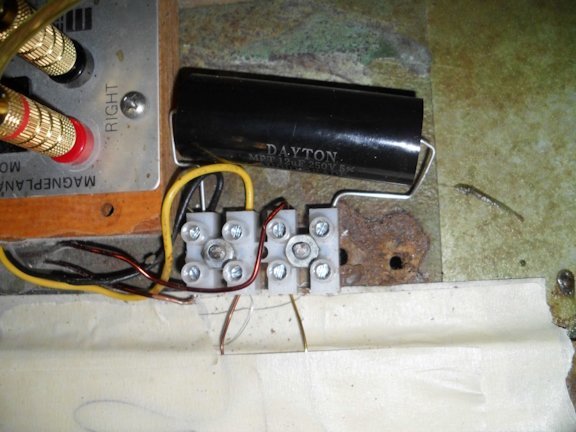
1st / 2nd pic show test results for old capacitors 3rd pic shows new connection block with new capacitor
-
Once the new runs have been allowed to set in the adhesive, you need to apply the 3M NF30 (Milloxane) sealant. Although the can sent by Magnepan had a small brush applicator included I decided to use a 1" foam brush for applying the sealant. I applied two light coats, waiting 12 hours between each one. Light coats is the key here as you want the mylar to remain flexible. While these were drying I decided to work on the crossover network. I had ordered some replacement capacitors as I assumed the existing ones would be dried out after 40 years and the values changed. Just for grins, after removing the caps, I tested them on my little component tester. Yep, confirmed; both capacitors were definitely way out of spec. They were supposed to be 12mfd and tested out as roughly 38mfd; definitely changing the bandwidth of the circuit. I also decided to replace the "connection block" (nothing more than some connector rings riveted to the mounting plate) with something a bit more forgiving to work with. The old connections were made using silver solder due to the dissimilar metals being used (copper wires, copper connectors and aluminum wires). Although I was trained in the Navy on how to solder to aluminum with silver solder, the process is not easy and I'm far out of practice. All pieces to be soldered need to be scrupulously clean and heated to the right temperature. I made one attempt and decided on a better method. I substituted a standard screw terminal connection block. All wires/component wires were sanded clean, dipped in No-Ox-ID (to prevent oxidation/corrosion) and then placed into the block. 1st pic shows entire panel coated with Milloxane 2nd pic shows original crossover network with connections
-
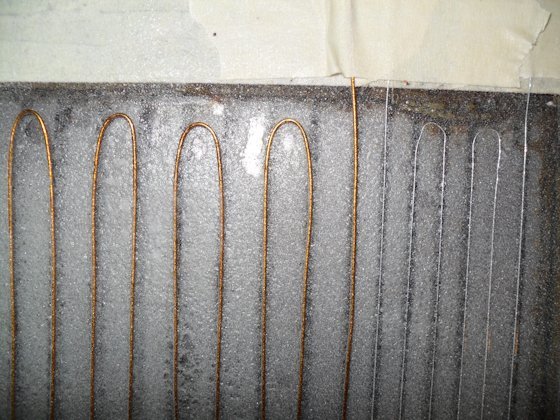
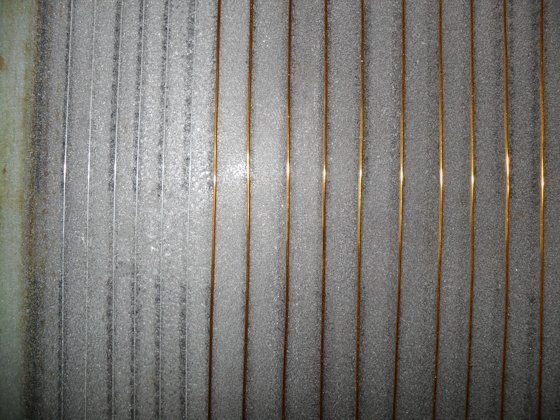
Next, is running the mid/bass wire (22 gauge coated aluminum wire). Basically the same procedure as for setting the tweeter wire; spray some Super 77 down, wait for tackiness and begin placing the wire. This one however is a bit trickier as the wires have to lay side-by-side during the long runs but must lay on top of one another on the loops. Also, care must be given when forming the 180 degree turn to keep the end from curling up and away from the mylar. I found that by twisting the wire (toward the mylar) as I made the turn kept the wire flatter. Once the first run is completed, you need to bring the end back around to the beginning and do it again. 1st pic shows the first run of the mid/bass wire 2nd pic shows both mid/bass runs completed alongside the tweeter wire
-
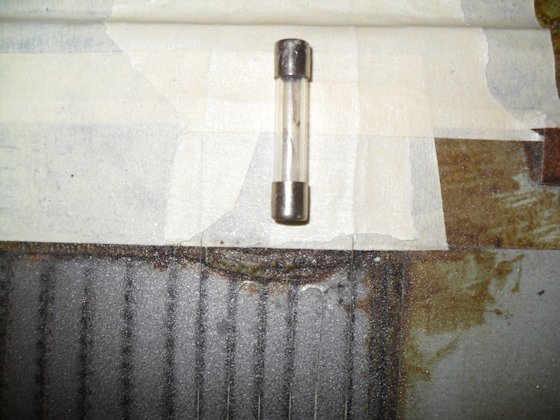
This pic shows the use of an old fuse to assist in making the 180 degree turns to start another run
-
The coils are held in place using 3M Super 77 adhesive. I started with the tweeter coil (32 gauge aluminum wire) and sprayed a coating of the Super 77 in the tweeter section. Once the Super 77 becomes tacky (knuckle test - adhesive doesn't stick to knuckle), I started laying down the tweeter wire being careful to keep the wire centered between the magnets. I left approximately 1 ft of wire on both ends so that I would have plenty of "slack" to work with. pic shows tweeter run and masking tape holding the "tails" in place (white stuff is the Super 77 adhesive)

-
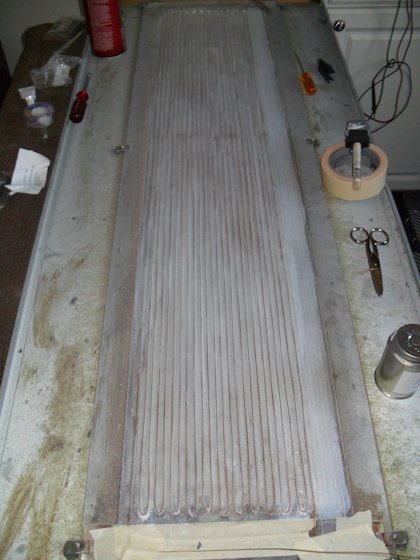
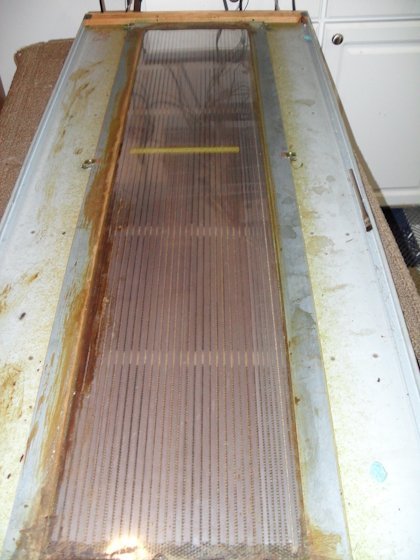
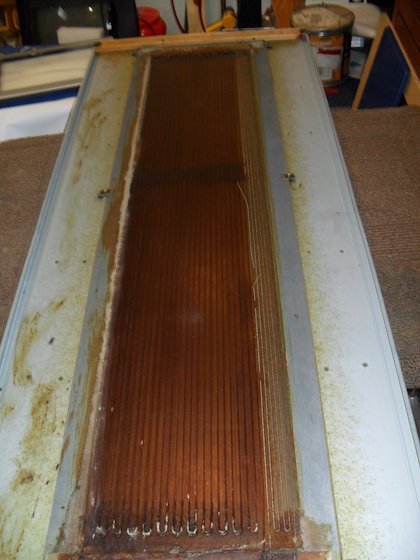
This pic shows the panel all cleaned and holes repaired. Note that you can see through the mylar to the wires hanging off my shop wall.
-
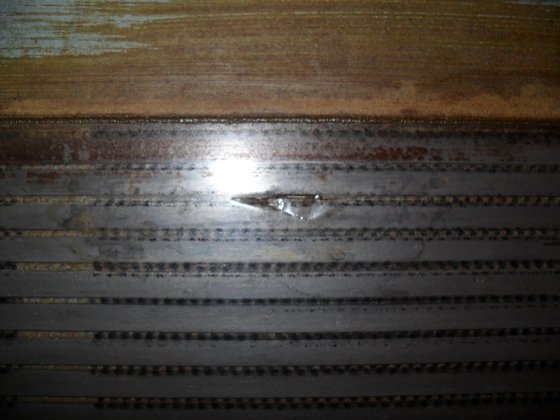
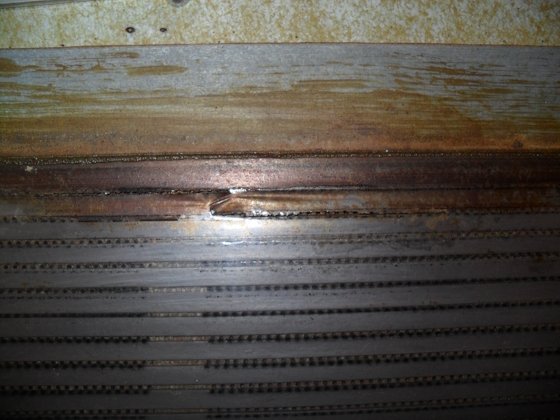
Next 2 pics pics show tears that need to be repaired
-
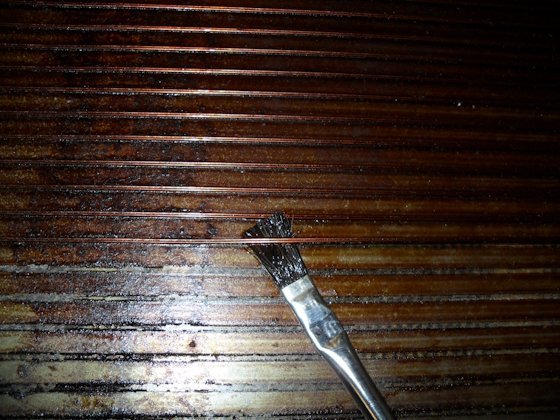
It takes a while but you finally get all of the 3M product off and you can see the mylar underneath. In fact, in the first pic you can see the clear mylar and the bar magnets (left of the acid brush). Unfortunately, after removing all of the wires and 3M junk, I did find some holes in the mylar. These can be repaired by using mylar tape (Scotch brand by 3M) and some spray adhesive as the glue on the tape is not strong enough to stay bonded to the surface during the vibrations of the music. You can see the cleaned area for the tweeters and the bar magnets.
-
-
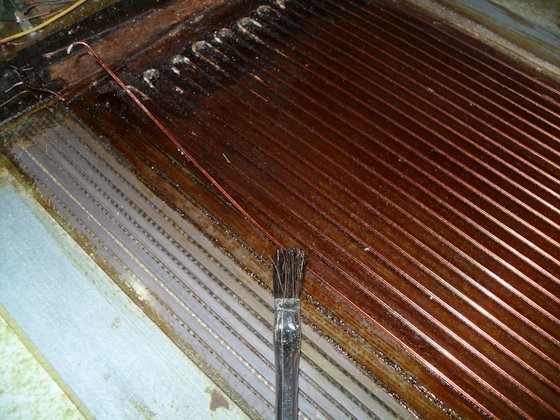
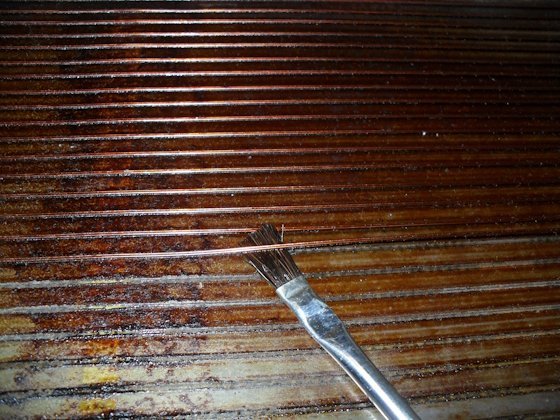
Next 3 pics show using an acid brush to apply the Acetone (sometimes lifting the wire and getting under it)
-
The red stuff you see coating the wires is a 3M product Magnepan used back in the day to help prevent corrosion. Obviously, after 40 years the coating has failed in places. After checking these I discovered that both speakers did not work at all (either set of coils). A thorough visual inspection revealed numerous breaks and missing sections of wire. Since this wire is aluminum there is no real way to make a mid-span splice/repair. The only way to restore these speakers is to remove the old coils and replace them. Thankfully, Magnepan sells a restoration kit for these. This requires using Acetone to breakdown/remove the old 3M product. The difficult part is the fact these wires are bonded to a mylar sheet and great care must be taken to prevent punching holes in it thus complicating the repair/restoration. 1st pic shows the speaker panel ready for restoration (you can actually see some of the broken tweeter wires)
-
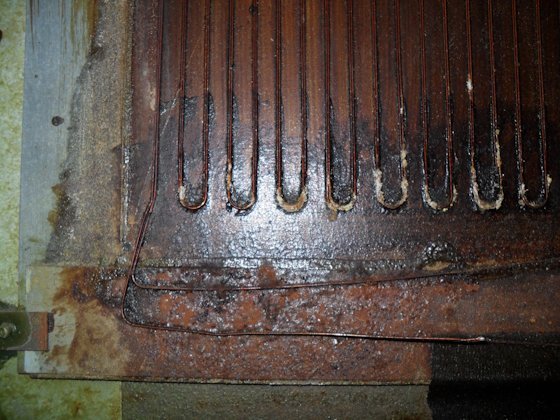
3rd pic shows more corrosion damage
-
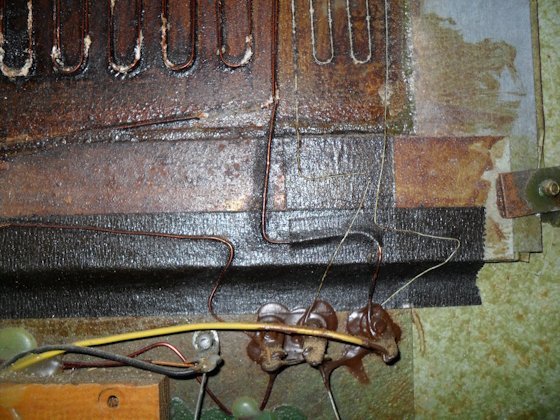
Looks like I got the image thing straightened out. Big thanks to @Sk1Bum for pointing me in the right direction! Second pic is showing both the mid/bass coil (on the left) and the tweeter coil (on the right). Take note of the crusty stuff around the loop ends. That is corrosion on the aluminum wires used for the coils.